April 27, 2010

cream of aspargus soup

I picked up these beautiful asparagus spears from the farmer's market. Yay spring! I also picked up a tattered old copy of "The Moosewood Cookbook" from a yard sale for 25 cents. I am kind of in love with the missing cover, notes in the margins, and food stains. The first recipe in the cookbook is cream of asparagus soup. Mmm... how fortuitous...

April 22, 2010

spinach ravioli

Yet another way to eat spinach - sneak it into your pasta dough! Earlier this week, I made a batch of 40 spinach raviolis stuffed with spinach, mushroom, onion, and tofu. Right after forming the raviolis, I put them in the freezer. The frozen raviolis make a great tasting instant dinner option - just boil them for 3 minutes and top with pasta sauce.

Spinach Pasta Dough Ingredients:
4 oz. spinach, chopped, steamed
2 c. semolina flour
3/4 c. water
1/4 c. olive oil
1 t. salt

Blend the pasta dough ingredients in a food processor for a minute. The dough should clump up into a ball. Take out the dough and knead in additional flour or water as necessary. Divide the dough into 4 balls. On a flour dusted counter, roll a ball out into a sheet. Rotate and flip once in awhile to make sure it doesn't stick. Mark a grid. Layout whatever filling you choose within the grid. Lay another sheet over the top. Press to seal along the grid. Work your way from the middle-out pressing out air pockets on you way. Slice to form individual raviolis. Throw them onto a flour dusted cookie sheet and put them in your freezer until frozen. Once frozen, you can transfer the raviolis into a bag or some other storage container.

April 13, 2010

vegan croque-monsieur aka savory french toast

I've had a thing for open-faced croque-monsieurs after I had an amazing one at Tartine in SF. I recently learned that croque-monsieurs include Béchamel sauce along with gruyère. I had this idea to make a vegan croque-monsieur with lots of Béchamel (just margarine, flour, and soymilk) and no cheese. The sauce browns nicely, but stays nice and gooey in all of the holes in the bread. Essentially, this is like a savory French toast, and it's great as a quick snack.

Vegan Béchamel Sauce Ingredients:
2 T. margarine
2 T. all-purpose flour
1/2 to 1 c. soymilk, depending on desired thickness
salt to taste
optional: nutmeg or cloves (ground)
optional: a splash of vinegar (cider or wine or hopped-up honey vinegar) adds some nice tanginess

Melt the margarine, mix in the flour (you know, like making a roux), add some soymilk and seasoning, and stir and cook until it's at a desired consistency. It should be pretty thick and come away from the pan. Spread it on a slice of nice chewy and holey bread and toss it on the frying pan like you're making Texas or French toast.

Then make a sandwich or top it with large chunks of caramelized onions and mushrooms soaked in wine. I bet sun-dried tomatoes would be great too.

April 12, 2010

vegan creamy spinach and biscuits

For St. Patrick's day, Eric made a traditional Irish soup which consisted of steel cut oats and leeks (his mom sent him a recipe from the Chicago Tribune). I must say that I was rather skeptical of the idea of a savory oat soup because I previously associated oats with sweet breakfasts. But oats are actually really good at the savory act. They make this gelatinous thick and creamy goo that combined with onions is like a tasty vegan gravy.

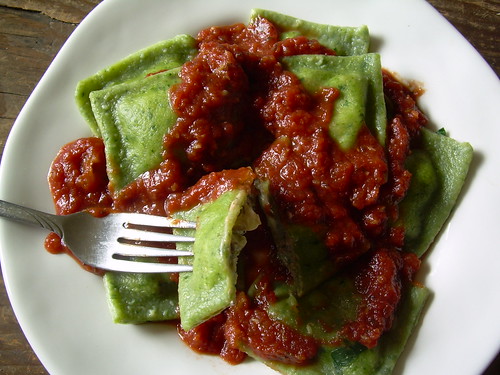
When I decided that creamed spinach would be on this weeks menu, I thought about buying organic heavy cream or making it vegan with a cashew sauce or soy milk... but I just wasn't enthused about the options until I remembered the potential of steel cut oats. Hence this take on creamed spinach.

I of course had to make biscuits too. I have been sort of obsessed with figuring out biscuits. From my experience so far, it seems that the most important factors for making my ideal biscuits are a rough ball shape, buttery drizzle, and low protein cake flour. Let me know if any of you out there have any other delicious biscuit suggestions.

Makes: 3 servings of spinach and 2 large biscuits

Vegan Creamy Spinach Ingredients:
1 c. yellow onion, diced
2 T. olive oil
1 c. water
1/4 c. steel cut oats
3/4 lb. spinach, chopped
3 cloves garlic, minced
dash of nutmeg
salt to taste
black pepper to taste

Vegan Biscuit Ingredients:
1 c. cake flour
3/4 t. baking powder
1/4 t. salt
1 t. sugar
3 T. vegetable shortening
6 T. soy milk
1/2 t. apple cider vinegar
1 T. melted margarine

For the creamy spinach, cook the onions in olive oil and salt over medium heat in a medium stock pot until the onions are translucent. Add water and steel cut oats and bring to a boil. Covered, simmer for 40 minutes or turn off the heat and let it sit for several hours (the second option is Eric energy-efficiency-approved but probably not food safety approved). Add the remaining ingredients and cook over low heat with a cover for about 20-30 minutes or until the spinach is a desired texture.

In the mean time, preheat the oven to 425 degrees. Use a fork to mix together the flour, baking powder, salt, sugar, and shortening. There should be clumps of shortening but nothing should be larger than pea-sized. Mix in the soy milk and apple cider vinegar until it is just combined. Don't over mix. Get some fresh flour on your hands and on the counter. Grab half of the dough, form a ball, drop it on the floury counter, roll it around a bit, and toss it back and forth between your hand a few times to form a roughly powdered ball. Plop it on a greased baking sheet. Repeat and plop the next biscuit right next to the other one. If you were making a party's worth of biscuits you would cram them onto the baking sheet. This encourages them to grow upwards not outwards. Drizzle some melted margarine over the tops of the biscuits. Put them on the top rack of your preheated oven and cook for about 15 minutes.
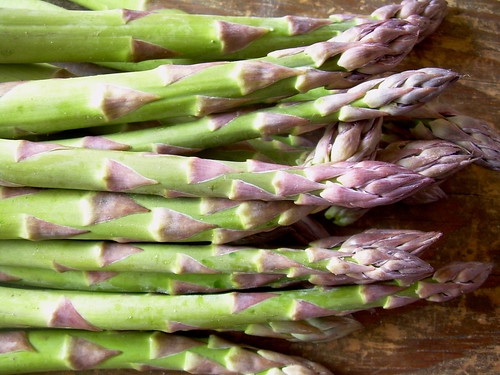
April 10, 2010

dandelion rhubarb mead

Once again, the dandelions are saying hello. Modern U.S. society has a funny hatred for dandelions. The truth of the matter is that for a long long time people across the world have found dandelions valuable for their early spring nutrition and for their medicinal values. In fact, European immigrants purposefully brought dandelion seeds to North America. So quit spraying your lawns with herbicides and start being thankful!

This time last year, Eric and I started fermenting dandelion rhubarb mead. It took about a month of going on walks and picking dandelions to gather enough flower petals. It's kind of a process, but its a good excuse to take a walk! It is good to pick right now because people haven't gotten fanatic about their lawns yet. Later in the season you have to pay more attention to who sprays herbicides and who doesn't.

We painstakingly removed all the green sepals from the yellow petals. Some recipes say you should, some say it's not necessary. Next time, we'll try using the whole flower heads, because this was WAY too much work--although it was a nice meditative kind of work (see middle photo below).

Ingredients:
3 qt. rhubarb stalks, chopped and frozen
~1 qt. dandelion flower petals, frozen
2.5 lb. honey

Bring 2 qt water up to almost boiling (180F). Stir in honey and maintain temperature at 160-180F for a while to pasteurize. Higher temperatures are fine, but you will lose honey flavor. Pour the hot honey-water over the rhubarb and dandelion petals in a primary fermentation bucket. You can use an airlock fit in the bucket lid, or do what we did and just cover the bucket with a towel--there should be enough CO2 being belched out that baddies can't get in. After a few weeks, strain out the solids and rack into a secondary fermenter with airlock. Rack it again and bottle when it's done bubbling.


The finished product! It has a nice pink color. Our last rhubarb mead was yellow, strangely--maybe the rhubarb wasn't ripe? At first tasting, the mead was a bit harsh and I would say it needed some aging. But after sitting out for an hour or so, it got pretty good. Maybe this is similar to the effect of decanting wine?

April 3, 2010

home fries with cashew sauce

Yesssssssss! Today was the first day of the Boulder Farmer's Market! I've been counting down for months now. Even though it was hard to wait, it made me really appreciate the first day of this seasonal ritual of meandering the stands of local farmer's and gratefully acquiring some gorgeous produce. I made the above produce into this:

a pile of purple peruvian and yukon gold home fries nested in a bed of tender mixed greens smothered in a creamy cashew sauce and accompanied by a side of sauteed lion's mane mushroom. Mmm, now I can't wait for next Saturday and the Saturday after that and the Saturday after that...

Serving Size: 2

Home Fry Ingredients:
2 medium potatoes, cubed (about 2 1/2 c.)
olive oil
1/2 c. shallot, minced
5 cloves garlic, minced
1 t. rosemary, crushed
salt to taste
black pepper to taste
1 T. lemon juice

Cashew Sauce Ingredients:
1/2 c. raw cashews
1/2 c. starchy hot water (left over from boiling the potatoes)
1 T. shallot, minced
2 cloves garlic, minced
2 t. olive oil
2 t. lemon juice
salt to taste

greens
lion's mane mushroom

Boil the potatoes for 10 minutes or until they just start to get tender enough that you can stick a fork in them. Pour off the water, saving 1/2 a cup of the potato water for the cashew sauce. Coat the potatoes in some olive oil and cook them in a cast iron skillet or frying pan for 10-15 minutes over medium-high heat. Stir sparingly or else you'll end up with mashed potatoes. When the potatoes are golden brown, add the shallots, garlic, rosemary, salt and black pepper and cook until done. Turn off the heat and add lemon juice.

Sautee the shallot and garlic for the cashew sauce. Throw all of the cashew sauce ingredients in a blender and liquify!

Serve the home fries smothered in cashew sauce with fresh, rinsed greens and lion's mane mushrooms (or some other mushroom) sauteed in olive oil, salt, and lemon juice.

applejack (freeze distillation) and sparkling cider

About eight months ago, we started fermenting two one-gallon batches of hard apple cider.

Batch #1 - Applejack via freeze distillation
I should start out by saying that home distillation of alcohol is illegal in many countries, unless you plan on using it for fuel. Freeze distillation, also known as fractional freezing, has long been used as a way to increase alcohol content of beverages like ice beer (e.g. Icehouse) and making applejack out of hard apple cider. You can't achieve the same alcohol concentration that you can with evaporative distillation, but the freezing method is cheaper and easier. Freeze distillation removes the water from the alcohols (ethanol, methanol, and fusel alcohols) instead of evaporating and condensing out the desired ethanol from everything else, as in conventional distillation. Methanol and fusel alcohols are generally considered undesirable (and hangover-causing) but they are present in undistilled beer and wine, and contribute to the flavor profile of ales and ciders. But at least with freeze distillation you can't accidentally end up condensing high concentrations of fusel alcohols by evaporating at the wrong temperature. I'm intrigued by some of the homemade evaporation stills I've seen, but I'm still intimidated by the need to keep track of the heads and tails of the process.

So, for this first batch, I added 1/2 cup of sugar every month or so until fermentation no longer re-started after adding sugar. In other words, until it was so alcoholic, yeast could no longer survive. This tolerance depends on the strain of yeast, but ranges from 5% for some beer and baking yeasts, to 23% for some "turbo yeast" strains. I forget what type of yeast I pitched--probably wine or champagne yeast, so I'd guess this batch maxed out at around 12-15% abv. When winter came around I put this batch in a 5-gal on the back porch. Repetitive freeze-thaw cycles are supposed to help with separating water from alcohol. I don't think it actually ever got cold enough to freeze though. Luckily, our freezer was able to get it cold enough, so this spring, I froze it in batches, and let the concentrated applejack strain out, as shown in this video:


And so, one gallon of hard apple cider became one half gallon of applejack. I'd estimate a final alcohol content of 20-30% for the applejack. Although I tried lighting it on fire, it didn't burn, but I did accidentally spill some of the fuel in my mouth, and it does taste really good! I even made a digestif of sorts, by soaking a "cinnamon" stick and cloves in a pint of the applejack. It tastes really good too!

Batch #2 - Sparkling Cider
For the other batch, I wanted to emulate ciders like Strongbow or Woodchuck. After the initial cup of sugar, I didn't add any more until we bottled it. We added priming sugar like you would for beer, aiming for 3 volumes of CO2. The verdict: it is good, but needs some aging to mellow out the flavor.

On a side note, I am super-intrigued by this inexpensive force carbonation method: capturing CO2 from fermentation in a mylar balloon and then force carbonating a mini-keg using a homemade PVC pump!

digestifs / tinctures

I've been experimenting with making various digestifs or tinctures of herbs that help with digestion. Pictured are tinctures of (left to right) basil, mint, licorice (glycyrrhiza glabra), sichuan pepper, and fennel, soaked for a week or so in cheap vodka (80 proof).

The sichuan pepper is experimental and pretty intense: it numbs your mouth and makes you want to throw up...the rest are carminatives known to help digestion. Basil, mint, and fennel are my favorites. You can mix equally with simple sugar syrup to make them tastier.