May 29, 2010

nacho ordinary cheese sauce

"Hey, what kind of sauce is that?" "It's nacho ordinary cheese sauce." Ahhahahah...

My architecture firm has season tickets to the Colorado Rockies which means Eric and I get to go to 2 games a season. I am not all that into sports but I do enjoy sitting outside, eating peanuts, and drinking beer. The experience could only get better if a concession stand sold veggie dogs or quality nachos, but alas they do not. No worries though, because the stadium allows you to bring in your own food so we brought nacho chips and a vegan nutritional yeast sauce.

Nutritional Yeast Sauce Ingredients:
3/4 c. soy milk
1 c. nutritional yeast flakes
2 T. olive oil
1 t. apple cider (or other) vinegar
1 t. garlic powder
1/2 t. onion powder
1/2 t. paprika
1/2 t. black pepper
1/4 t. salt (or to taste)
dash cayenne

Combine everything and blend with hand blender, stand blender, or fork. You can heat if you want, but it's not necessary.

May 23, 2010

honey run

We rode our bikes up to Lyons, CO (32 miles round trip) and refilled some empty containers with 20 lbs. of affordable, local honey from Madhava. We also stopped at Oskar Blues for beer ice cream. Mmm... It was a good ride but a really windy day as you can see from the photo.

We'll be making similar posts in the upcoming weeks. Why? Because we plan on doing several bike trips to surrounding towns this summer. The long term motivation is to increase our fitness and endurance so that we can eventually do longer trips across Colorado, around Lake Michigan, maybe even across the U.S. The more immediate motivation is to get out and enjoy surrounding microbreweries, campgrounds, etc. without any need for a car.

May 19, 2010

ipa yeastcake bread

We transferred our IPA to a secondary fermenter and I decided to try using the leftover yeast cake to make some bread. I just added some flour and water to the yeastcake to make it into a sponge (I added some bread yeast too), which I fermented until I felt like making bread. It doesn't have much of a hop aroma because this was before dry-hopping, but it is sooo bitter! ...and tasty, especially with marg and honey.

I also saved the hops for future experiments. Got any good recipes for reusing homebrew hops?

May 17, 2010

rhubarb pie

I know, I know, all of the food here lately has included spinach or asparagus. What can I say, it's early spring. So onto another early spring classic - rhubarb pie. Strawberries aren't in season yet here in Boulder, Colorado (it snowed last week?!), so this pie is straight up rhubarb. I personally enjoy the tartness. If you insist on cutting the tartness, serve the pie with ice cream.

Pie Crust Ingredients:
2 1/2 c. flour
1/2 t. salt
1/2 t. sugar
2/3 c. canola oil
1/3 c. cold water

Pie Filling Ingredients
1 1/2 lb. rhubarb, chopped
1 c. sugar
1/4 c. all purpose flour

Mix together the pie crust ingredients until they come together. If you have the time, you can refrigerate the dough for a little while to reduce shrinkage during baking. I didn't.

Preheat the oven to 425. Grab 2/3 of the crust dough and roll out on a lightly floured counter. Roll the dough into a circular shape to fit your pie dish. Put the dough in an oiled pie dish. Finish off the edges. Mix together the pie filling ingredients. Fill the pie crust with pie filling. Roll out the remaining 1/3 dough into a rectangle and cut into strips. Form a woven lattice top pie crust with the strips of dough. Put the pie in the oven on the lowest shelf. Bake 15 minutes at 425 degrees. Reduce the heat to 350 degrees and bake another 30-45 minutes.

May 16, 2010

homemade tempeh

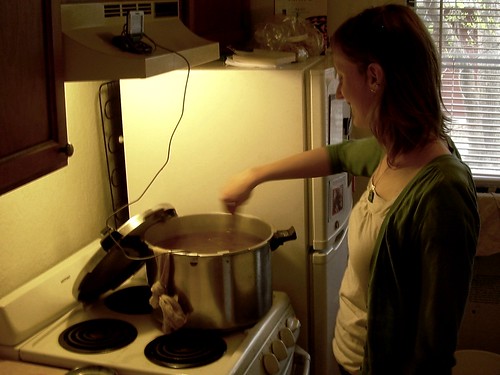
Earlier this week we made tempeh with some friends. I described the temperature controller we used in a previous post. The rest of the process included grinding, de-hulling, cooking, drying, and packaging.

So how did it turn out? Well, it was a bit "ripe"... We didn't get any photos, but the tempeh cakes were covered in white and black fuzz and smelled strongly of ammonia. The tempeh was mostly salvagable (including our experimental half-turtle bean batch). We cut off the exterior fuzz and fried the interiors until the smell wasn't very noticable.

We're not exactly sure what caused the "ripeness", but it was probably because, at the start, we had trouble maintaining the 85°F required with 6W (oops, I should've done a load calc on the cooler!) so we had to add some Christmas lights for extra heat. This caused the heat to be a bit uneven, so the tops were "done" while the bottoms were not yet solid. Oh well, we'll get better with practice!

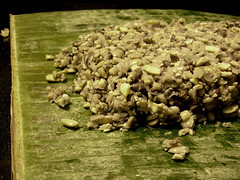
As you can see in the before incubation photo below, we used banana leaves as the wrapper, as is traditional in Indonesia. I think next time, we'll try plastic bags because they allow you to check done-ness more easily.

Lessons Learned:
  • Make sure you have enough heat to keep the incubator/cooler at 85°F.
  • Put heat source at the bottom of the incubator.
  • Put tempeh cakes in the fridge to slow/stop at first sign of done-ness, as they'll continue to grow in the fridge until they get cold enough.
  • Plastic bags make checking done-ness easier (helpful for inexperienced tempeh makers like ourselves).
  • The half-soybean, half-black bean batch worked fine, but the resulting cakes were a bit more crumbly than the all-soybean variety.
Our friends who lived in Indonesia for a year cooked a tempeh feast. They made a variety of delicious dishes: oseng-oseng, tempe and tofu bacem, sweet potato, kale, and tempeh stew, and fried tempeh with sambal terong (spicy eggplant salsa).

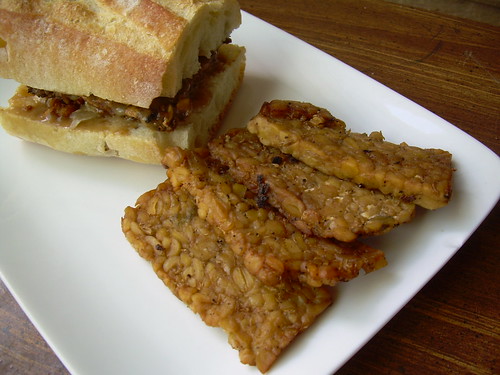
The sandwich above is fried tempeh with sauerkraut and a peanut sauce.

May 11, 2010

temperature controller

We finally got around to making a batch of tempeh. In order to maintain the proper temperature for incubating it in a cooler, we came up with this control device made from a spare thermostat, a light bulb, and a 120V to 24V doorbell transformer (thanks Jack!). All of which are scrap parts that can be attained inexpensively.

Most home heating and cooling system thermostats require 24V, so this makes the transformer necessary. At 24V, a 60W incandescent lamp will use 6W, which is close to the 7W light bulb recommended by the tempeh culture instructions.

The thermostat we used only goes up to 82°F, whereas incubation is supposed to be in the 85-90°F range, but hopefully it works out! We also added some thermal mass (water) to the container to moderate the temperature swings.

Off the shelf options include:
reptile terrarium temperature controller (60-105°F)

brewing temperature contoller (20-80°F)
Or get the deluxe Fridge/Fermenter Controller from Holy Scrap Hot Springs when it is ready!

The reptile controller would not be good for controlling refrigeration as it isn't designed with the proper hysteresis to prevent wear and tear on the compressor. However, you could get away with using a peltier/thermoelectric refrigerator for cooling.

Update: The 6W wasn't enough to keep the temperature up, so we switched to a 75W lamp (9W) plus 11-16W of uncontrolled Christmas lights, which let us get up to 90°F.

May 10, 2010

homebrew #3 - india pale ale

We started brewing our third homebrew on Friday--an IPA (Dogfish Head 60 min. IPA clone)--perfect for summer! Conveniently, we can use our 16 quart pressure canner pot (aluminum) to boil the wort.

Interesting comparison of stainless steel and aluminum pots: here.

Update: we're calling it the Walter Cronkite IPA.

May 3, 2010

pad thai

We had some green onions in the fridge that were verging on old so I made pad thai for dinner. The only thing I really have to say about pad thai is that I find it difficult to put my chopsticks down when I'm full. It's just so good! Beware.

Ingredients:
7 oz. rice noodles
2 T. unrefined peanut oil

1 c. hot water
1/4 c. tamarind pulp
1/4 c. sugar
2 T. soy sauce
2 T. lime juice
red pepper flakes to taste

1/2 lb tofu, diced
1/2 lb asparagus (optional), chopped
1 T. unrefined peanut oil
5 green onions, diced
5 cloves garlic, minced
1 egg
2 c. bean sprouts
1/2 c. peanuts, chopped

Boil water in a pot. Remove from heat and add the rice noodles. Let sit for 10 minutes. Drain and coat in peanut oil.

Heat water and soak tamarind pulp for 10 minutes. Strain tamarind liquid over the finished rice noodles. Stir in sugar, soy sauce, lime juice, and pepper flakes.

Sautee the tofu and asparagus. When the tofu is golden, add the green onions and garlic and cook for a minutes. Crack an egg and scramble. Add everything to the rice noodles. Also toss in the bean sprouts and half of the peanuts. Mix everything together. Use the remaining peanuts to garnish individual servings. If you can get your hands on some cilantro, garnish with that as well.