July 5, 2014

using a plastic planter as a bait hive for honeybee swarms

2014.05_bait hive

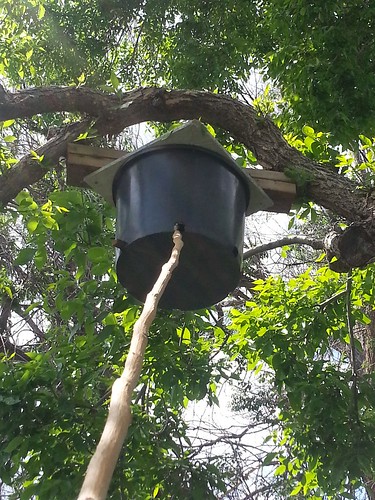
Eric made and hung a simple bait hive this spring.  The hope is to lure, catch, and transfer a swarm of bees that are looking to relocate anyway from the bait hive into your backyard hive.  Often a healthy hive of well established bees will make a second queen and half of the bees will leave with her to build a new hive.  Before they leave, the bees will scout out ideal locations (high above the ground, hollow, enclosed spaces) and then vote on where they'd like to resettle.  It's a democracy after all.

According to research by Thomas D. Seeley, documented in the excellent book Honeybee Democracy, honeybees most frequently choose cavities with volume around 40 liters (around 10 gallons). Eric thought about buying a 10-gallon plastic planter, but we had a 7-gallon planter laying around, so we used that. Eric covered the top with plywood and attached the bait hive with screws to the tree for smooth removal in case we do need to transfer a swarm some day.

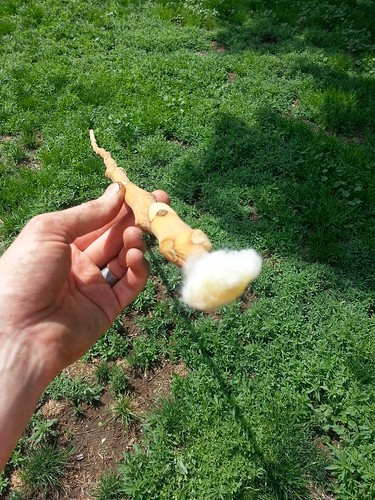
We don't own a ladder taller than 6 ft., so we borrowed a neighbor's ladder to mount the hive. Eric uses a long stick (with a nail on the end) to periodically insert a cotton ball soaked with lemongrass oil into the hive.  The lemongrass oil is similar to queen pheromones which is supposed to entice the scouts.
  2014.05_bait hive cottonball stick

July 1, 2014

chicken coop

2013.12_chicken coop 01

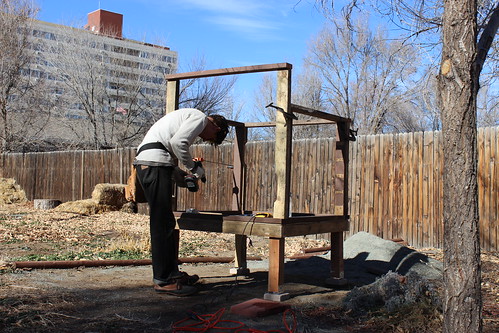
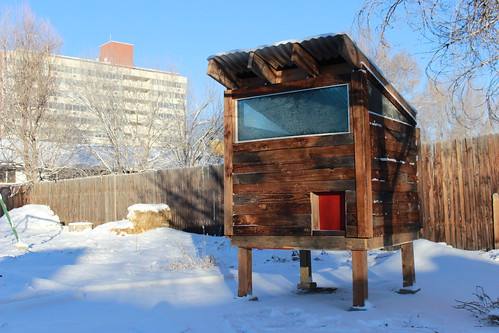
Eric spent the warmer days this past winter building our chicken coop.  Isn't it beautiful?  It is based on one of the simpler designs from Building Chicken Coops for Dummies.  All of the lumber and sheathing is reclaimed wood from Craigslist free.  The siding is reclaimed fencing from our back porch.  The roof is corrugated metal.  The walls, floor, and roof are all insulated (R-19 roof, R-13 walls and floor).

2013.12_chicken coop 02
With insulated 2x4 walls, a 4' x 4' footprint only provided about 12 sf of chicken living area, but with the 48 sf run, this will be enough for 6 chickens. Construction was made easier because regular wall framing with 16" o.c. studs was not required.

2014.01_chicken coop 06
Interior structural sheathing with plywood and OSB. No exterior sheathing (to save weight), just asphalt paper (found in the garage when we moved in) for a water and air barrier, and the cedar cladding on top of that (spaced out with 0.25" furring strips for a rain gap, of course).

2014.01_chicken coop 07
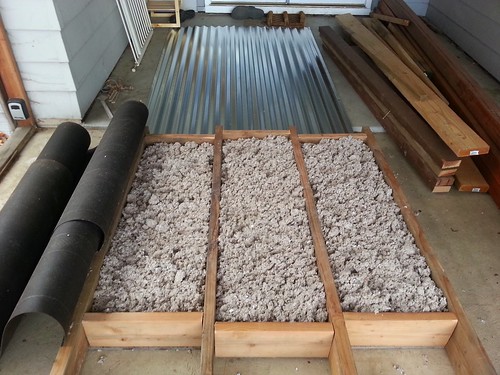
R-19 cellulose insulation for the roof (2x6 rafters). This used a lot more insulation than I thought, since it didn't get passed through the cellulose blower machine to loosen it up. Next time I'd probably use fiberglass batts, but cellulose was convenient because the rafter spacing was not 14.5" so batts wouldn't fit without trimming.


2014.01_chicken coop 08
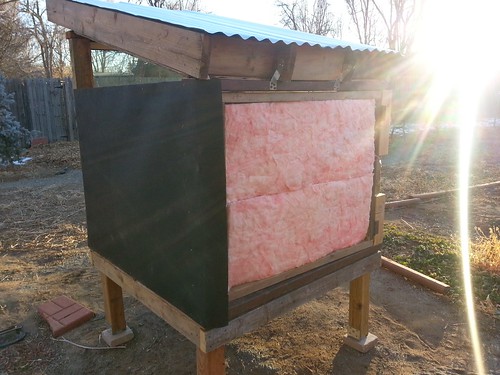
Fiberglass batt wall insulation, covered with asphalt paper.


 2014.01_chicken coop 03
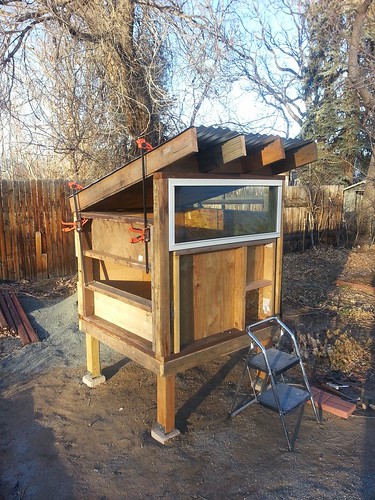
Finished coop, still lacking a run.

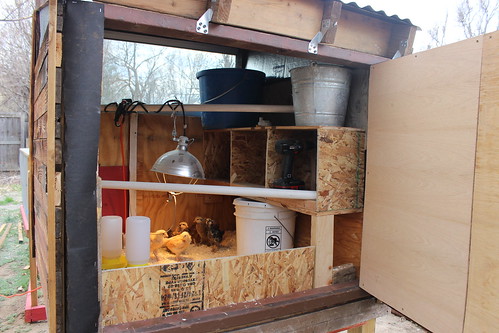
The window is a reclaimed triple pane from our local Habitat for Humanity store.  Eric positioned it so that the roof overhang shades the window during the summer but allows plenty of sun during the winter.  There is a wireless temperature sensor inside the coop so we get alerts to close or open up the ventilation areas (removable 1" foil-faced polyisocyanurate rigid foam triangles). The sensor was also used to monitor the heat lamp/temperature during the first 10 weeks when chicks need supplemental heat.

2014.05_chicken coop 09
The 1/2" hardware cloth for the 4' x 12' run was the most expensive component! A nice side effect is that the mesh is closely spaced enough that snow piles on top so the chickens won't be snowed in. Half of the chicken run can be separated to be used as a chicken tractor.

2014.04_chicken coop 05
The whole back wall swings open for easy access for cleaning.

2014.03_chicken coop 04
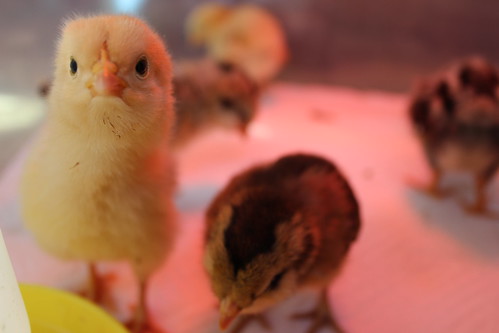
As for the chicks, we got 2 Buff Orphingtons, 2 Ameraucanas, 1 Silver-Laced Wyandotte, and 1 Rhode Island Red.  These chicks are already teenagers now.  At four months old, they look pretty much look full grown.  We expect they will start laying eggs when they are six months old which will be in October!

June 30, 2014

cloth baby wipe spray

2014.06_cloth baby wipe spray

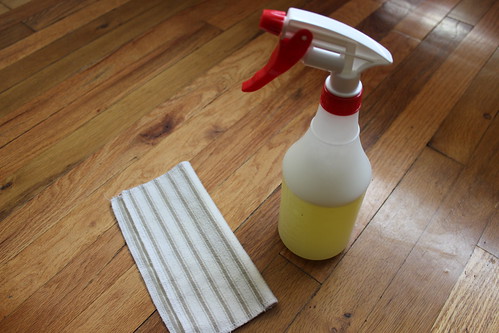
What's with this blogging hiatus?!  Well... we had ourselves a baby!!  We also built a chicken coop, got chickens, restructured our covered porch, started a garden, planted grapes, hung a bee swarm trap, installed a patio, brewed beer (galactagogue oatmeal milk stout), brewed apple jack, hosted family, and ate many tasty meals.  We will catch you up on some of the highlights in a bit, but first I want to do a little record keeping and post the recipe for the cloth baby wipe spray that we've been using.

16 oz. filtered water
1/2 oz. olive oil
1/2 oz. baby soap/shampoo
a couple drops of tea tree oil

November 9, 2013

more pottery!

Not bad for my third and fourth pieces of pottery.   :)

2013.11_pottery (1)

2013.11_pottery (2)

2013.11_pottery (3)

Also, we finally got a digital SLR camera!  Yay for depth of field!  I have been wanting a DSLR badly for at least five years now, but there always seemed to be some financial hurdle to overcome (paying off college, paying for a wedding, buying a house).  With a baby on its way, though, we're going to want to savor those precious moments as best we can.  Plus I figure we'll be saving money if you compare buying a nice camera to taking a child to a professional photographer every few years.  Think DIY, people!

November 3, 2013

pumpkin pie brulee

2013.10_pumpkin pie brulee
Everybody's doing it!  And I think with good reason - this is a tasty food fad.  Honestly, I have never enjoyed pumpkin pie until this pie.  What changed?  The crisp caramelized sugar top makes things so much more interesting and in this case it was paired with a chocolate crust.   If I haven't sold you yet, doing a brulee means you get to play with fire!  I used a recipe from Bon Appetit though next time I will make a less fussy chocolate crust.

October 26, 2013

raised garden bed and sheet mulch

We built this raised garden bed with free wood from Craigslist!  I wanted a raised bed so that we could plant  more frequently harvested garden veggies like lettuce closer to the house and so we could easily put season extending hoops with a clear plastic sheet creating mini greenhouses in the spring and fall.

AND.  We filled the raised bed with sheet mulch - cardboard, manure, and wood chips (all of which we can source for free).  The layers should decompose over the winter and worms and other bugs should churn it up so that by the spring we have an excellent soil to plant in.  Here's a step by step:

Lay down a thin layer of manure.
2013.10_sheet mulch 001


Be sure to water each layer as you go.
2013.10_sheet mulch 002


Layout the cardboard.  Cover any exposed seams with newspaper.
2013.10_sheet mulch 003


Add some more manure. 2013.10_sheet mulch 005


Add a whole lot of wood chips. 2013.10_sheet mulch 006


We covered the top with leaves just because. 2013.10_sheet mulch 008

September 22, 2013

peach tree gummosis

2013.09_peach tree gummosis
Our peach tree got gummosis bad, up and down the whole trunk. I've never seen globs this big. It makes be realize how the amber-preserved mosquitoes from Jurassic Park could really happen.

Gummosis is just the descriptive symptom. Sifting through the internats, it is most likely the tree's reaction to holes drilled by an insect, peach tree borer, or to a fungus, cytospora canker.

I read that some dwarf fruit trees get gummosis as a matter of course, when watered heavily. Ours is a semi-dwarf, but this happened after Colorado's week of record-setting rains (we fortunately didn't get any flooding or hail, but some nearby farms got pretty devastated by hail).

Peach tree borer seems unlikely since they usually burrow below the soil/mulch surface. If it is the canker, that's bad, since you're supposed to remove infected areas and the whole trunk is infected. I'm hoping the tree will pull through. I'm continuing to give it plenty of water.

camelia sinensis blossoms

2013.09_blooming tea plant
Our tea plant blossomed today. It, and the lime tree we got in the spring, seem to be doing fairly well. I've had them on the shady north side of the garage, tucked between irises and alliums. They stay pretty moist there. Surprisingly, tea can be planted as far north as Toronto with the right microclimate, which includes the shady north side of buildings.

You can make a non-caffeinated tea from the flowers or eat them, but I want to see what happens with fruiting.

September 13, 2013

deluge of tomatoes


Prior to the deluge of rain along Colorado's Front Range, we had a deluge of tomatoes ripen in our garden. I canned this pile of tomatoes last weekend.  The resulting 5 pints of pasta sauce will certainly taste good in the winter!

September 7, 2013

share your skills! worm composting class

2013.08.26_worm bin class10

Exciting things are happening in Wheat Ridge!  We are part of a newly developing group called Live Local Harvesters that is building community around gardening, urban homesteading, livestock, local agriculture, etc.  We have monthly potlucks sometimes accompanied by food politics movies.  We have informal skill sharing classes led by community members.  We have informative barn raising events like for example a group set up drip irrigation in one person's backyard and everyone left knowing how to do it in their own yard.  We have a message board where people can ask questions, post new discoveries, or host improptu events.  It's all very fluid and energized which is very exciting.

Anyway, Eric recently taught a skill share class on worm composting and building worm composting bins.  Everyone who attended and wanted a worm bin left with a worm bin that they helped to build and some worms.  It was an excellent community building event!