September 14, 2014

eggs

2014.09_backyard chicken eggs
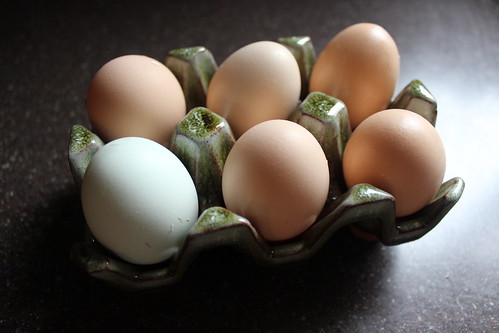
Eggs from our very own chickens!! YAY!!! I have wanted this for years! See? Dreams really can come true. We are getting about 4 eggs a day right now. This should taper off over the winter since we don't plan on using artificial lighting to trick them into laying more. 

(p.s. thank you Cait for the beautiful terracotta egg rack!)

September 13, 2014

hatch green chile jelly vs. plum jam

2014.09_jam jelly contest
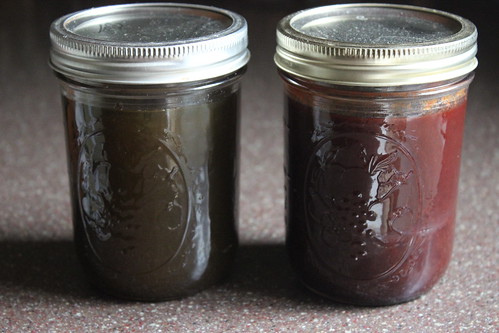
Wheat Ridge, the lovely town we call home, is hosting a festival today call Ridgefest that involves food trucks, craft brews, local artisans, a homebrew contest, a cottage foods contest, and much more.  Similar to the scope of foods allowed by the Colorado Cottage Foods Act, this contest will feature breads, pickles, and jams/jellies.  It is a fun way to let people know that the Colorado Cottage Foods Act was passed 2012 and that they are now legally able to sell certain homemade foods from their home kitchen rather than a commercial kitchen. 

Eric and I will be competing against each other!  I made a hatch green chile jelly and he made a tart plum jam.  We shall see what happens!

September 12, 2014

patio

2014.09_patio 02
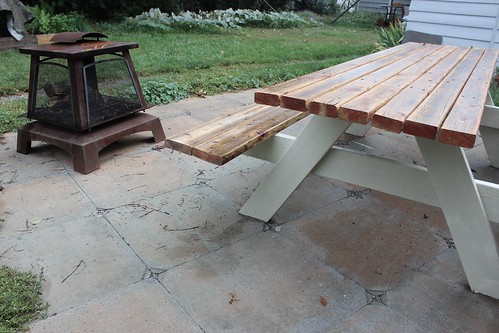
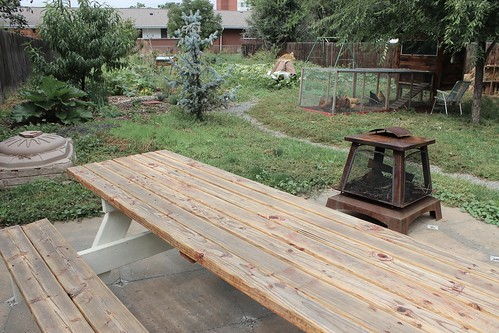
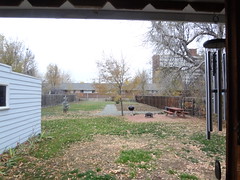
This patio project is actually old news.  I finished it mid summer but neglected to post about it on the blog.  The patio stones are 2' x 2' reclaimed concrete pavers from an office building's raised floor system.  The notched corners, once for the raised floor pedestals to lock into, now are reminiscent of a tile floor pattern.  The pavers are gray though they look a little red in this photo because when we got them they were sticky with carpet glue so we had to scatter sand on the surface.  Hopefully in another year the weather will wear away all of the glue and the sand can be swept away.  Below the pavers is about 1" of sand for leveling and about 4"-5" of crusher fines.  We used ProFlex paver edging around the perimeter.  This patio should stay put!  (thanks Dad for all the help digging and filling!)

For furnishings, I refinished a weathered red picnic table that the previous home owner left behind.  The base frame is painted a creamy white and the horizontal surfaces have been sanded down to wood and coated with a natural beeswax/linseed oil finish.  I think I will go with a darker wood stain when the picnic table needs to touched up.

And what a view of the chickens!
2014.09_patio 01

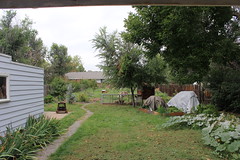
Here's a little backyard before and after:
2014.09_patio 2012 before   2014.09_patio 2014 after

August 22, 2014

flannel bag

Phew! We just got home from a road trip. I was worried about how our 5 month old would handle hours of sitting in the car. He does fine on short car trips around town (I can't wait until I carry him around in a bike carrier!) but for hour long car rides he gets irritable. In hopes of avoiding 12 hours straight of crying in the car, I gathered all of the distractions I could think of including this homemade flannel bag with felt pieces. Why a bag instead of your standard felt board?  I thought it would be more portable, it can be hung from the head rest, and it can store all of the felt pieces!

road trip theme
2014.08_felt board bag road trip

make your own monster faces (copied from this site)
2014.08_felt board bag monsters

The felt board concept actually didn't interest him this time around but I think he will enjoy it soon enough. And to his credit, he did amazingly well sitting in the car for hours! PHEW!

July 23, 2014

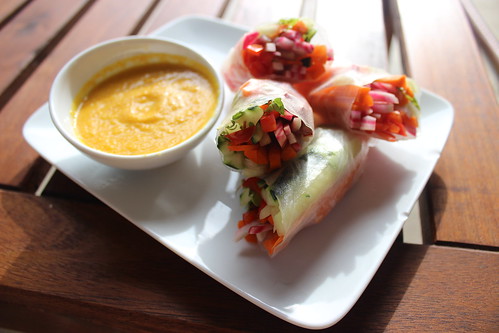
spring rolls with carrot ginger dipping sauce

2014.07_spring rolls with carrot ginger dipping sauce
It's summer, it's hot outside, and we don't have air conditioning so, Self, please refrain from the stove at least a few nights a week!!  We've posted about spring rolls here before but here's a twist on our old standby that includes more colorful veggies like red peppers and beets!  The sauce is pretty great too!  Thanks again to a recipe from Martha Stewart's Meatless cookbook.  Have I ever mentioned that one of my favorite leisure activities is leafing through cookbooks from the library?  I wonder which cookbook I will borrow next...

Ingredients:
rice paper wrappers
radish sprouts
3 carrots, julienned
3 candy cane beets, peeled, julienned
1 cucumber, julienned 
1 red pepper, julienned
1/2 lb. firm tofu, sliced into long strips

Sauce Ingredients:
3 carrots, chopped
1/4 onion, chopped
2 T. fresh ginger, peeled
1/4 c. apple cider vinegar
2 T. tamari
1/4 t. toasted sesame oil
salt
black pepper
1/4 c. sunflower oil
1/4 c. water

Soak rice paper wrappers in warm water until just pliable.  Put the rice paper wrapper on a plate, load it up with veggies, and roll.  Dry off the plate between spring rolls so you get a good sticky surface to pull the wrapper taught.

For the sauce, blend everything but the oil and water until smooth.  Then add the oil and water while the the blender or food processor is running.

July 20, 2014

garlic harvest

2014.07_garlic harvest
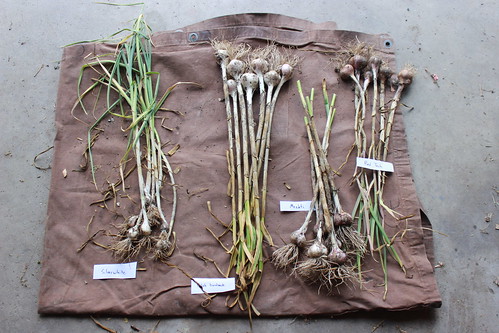
Garlic varieties: Silverwhite, Polish Hardneck, Mechti, Red Toch

I harvested most of our garlic crop today. Polish Hardneck is the definite winner in terms of size and quality. We were a little late in harvesting the Mechti...a lot of the encasing skin disintegrated, so those bulbs will not store well.

July 19, 2014

coconut curry red lentil soup with dried currants

2014.07_coconut curry red lentil soup with dried currants
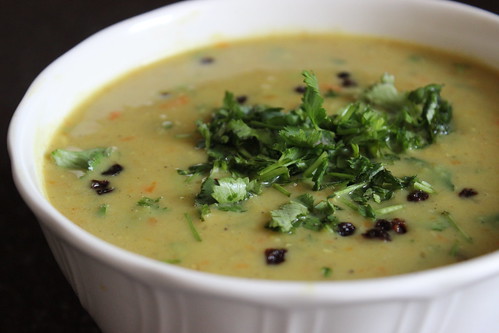
Thanks to the little baby now at the center of my life, I have a new appreciation for single vessel meals that have the flexibility of being abandoned without overcooking.  Brace yourselves for more soups, stews, and casseroles on this blog!  I know... how stereotypical American...  well, so is my inspiration for this soup!  Good old Martha Stewart (or one of her ghost writers) inspired me to take a different spin on my usual red lentil soup by adding coconut milk and dried fruit.  Yum! 

Ingredients:
olive oil
1 1/2 c. carrots, diced
1/2 c. onion, diced
4 T. fresh grated ginger
half a head of garlic, pealed and minced
1 1/2 T. curry powder
1 T. salt
8 c. water
2 c. red lentils
1 16 oz. can coconut milk
dried currents
cilantro

Saute the carrots, onion, ginger, and garlic in olive oil until the onion is translucent.  Add the curry powder and cook for a minute.  Add the salt, water, red lentils, and coconut milk.  Bring to a boil and then reduce heat, cover, and simmer for 10 minutes.  Use an immersion blender to partially blend the soup.  Serve with dried currents and cilantro.

July 8, 2014

veggie empanadas

2014.07_veggie empanadas

Man, let me tell you, our friends know how to cook!  We got through the early weeks of new parenting thanks to the delicious meals that they dropped off.  Now that we are further into the parenting thing and we don't have food arriving at our doorstep, I am looking for ways to enjoy quick homemade meals.  One way is to make a larger quantities of food when you do cook and freeze the surplus.  I bet you'd pay big money for one of these empanadas from the freezer section of a health food store!

Veggie Empanada Filling Ingredients:
black beans
zuchinni
summer squash
corn
chives
garlic
chili powder
cumin
lime juice
olive oil

Spinach Empanada Filling Ingredients:
steamed spinach
chili powder
garlic
queso quesadilla
ricotta
parmesan
lemon juice

Empanada Dough Ingredients (recipe from Veganomicon):
2 c. all purpose flour
1/4 c. corn meal
2 T. sugar
1 t. salt
1/2 t. baking powder
1/2 c. non-hydrogenated vegan shortening
1/2-3/4 c. cold water
2 t. apple cider vinegar
 
Precook/premix the filling ingredient.  Since I was making a big batch of empanadas, I quadrupled the dough ingredients.  Mix together the dry ingredients for the dough.  Add the shortening in pea size chunks as though you were making biscuits.  Stir in the cold water and apple cider vinegar.  I needed a bit more than 3/4 c. cold water but maybe that's the desert climate of Colorado...  Lightly knead the dough into a ball.  Roll out the dough on our floured counter.  Refrigerate for an hour on parchment paper and wrapped in plastic.  Roll out the dough some more.  Use a bowl to stamp out circles.  Stuff em, fold em, and make the edges pretty.  Bake for 25 minutes at 400° F.

July 7, 2014

early july fruit harvest


2014.07_fruit harvest red currents

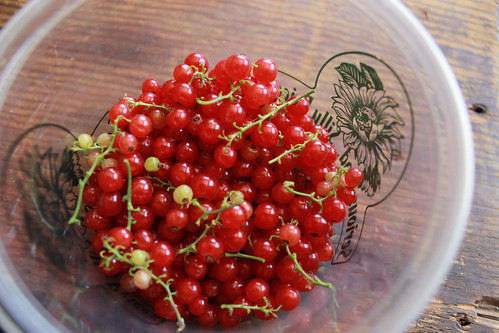
This past week, we've harvested some of the first fruits from the yard since we moved in January 2013. Unfortunately, there has been late frosts both this year so we haven't gotten any fruits from our 7 fruit trees. (Ok, there were three pears and I put plastic bags on them to try saving them from the birds and squirrels, but that just dried them out! Maybe I did it too early or the sun is just too intense here in Colorado).

Fortunately, we planted a redcurrant bush last fall, so we got a decent harvest from that (above). I made a redcurrant/rosemary freezer jelly.

2014.07_fruit harvest lime
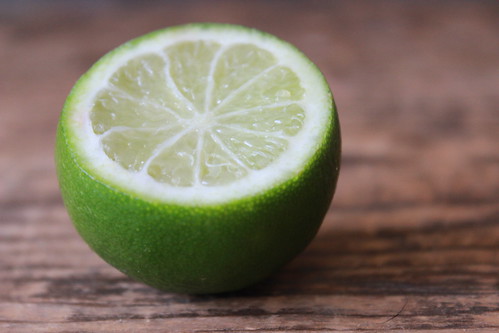
Yes, this is a lime that we grew. Our lime tree has had a single lime on it for the past 6 months. I've had it outside in the shade and a squirrel finally decided that it was time to harvest. I found the lime in another planter with a tiny bite out of it. I saved it and ate it with chips and salsa, and with empanadas.
 
2014.07_fruit harvest gooseberries and volunteer nantucket cherries
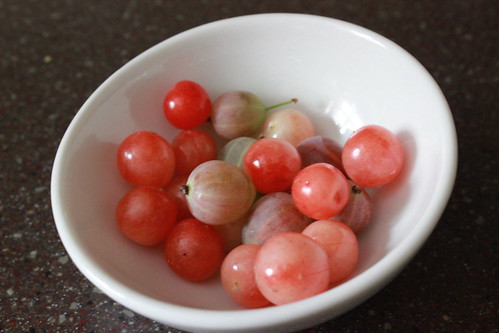
I was excited to identify a patch of brambley bushes in a corner of our yard as red nanking cherry. And they happened to have a handful of ripe cherries on it, buried in the middle of the brambles–the birds must've gotten all the more exposed ones. Shown here with a few gooseberries mixed in. Both are pretty tasty!

July 6, 2014

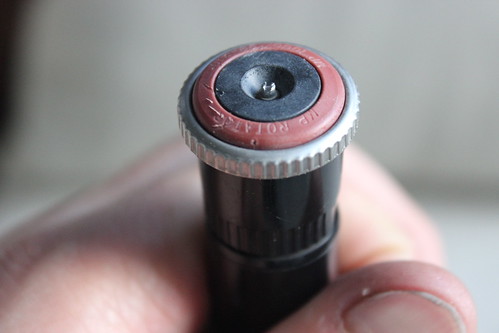
how to adjust Hunter Pro-Spray sprinkler heads

2014.07_sprinkler system spray adjustments 01

2014.07_sprinkler system spray adjustments 02

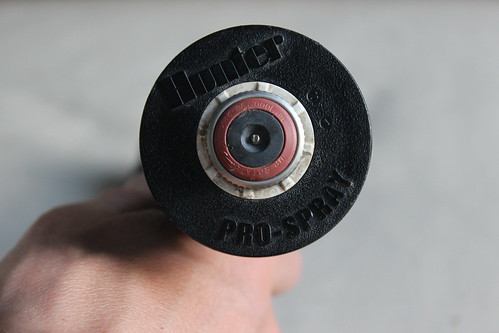
With all of the changes we've made to our yard, we've needed to make adjustments the sprinkler system that came with the house when we bought it. Eventually we hope to convert a lot of the heads to drip but for now we have capped a few and adjusted to spray direction for many.  This post is really just a note to self for how to adjust the spray heads next time since we have to look it up every time and use trial and error.

Our sprinkler heads are Hunter Pro-Spray.  There are different colored heads which indicate reach, and how narrow or wide of an area the sprinkler can cover.
  1. To set the left edge of the coverage area, twist the silver ring counter-clockwise until you hit the spot.
  2. Twisting it at least 360º will reset the spread angle to the minimum, usually 90º.
  3. Then twist the silver ring clockwise to expand the spread to the desired angle.
From what we've read the screw on the top should adjust the distance the sprinkler spray but we did not see much of a difference when we tried it.