Showing posts with label reclaimed wood. Show all posts

July 1, 2014

chicken coop

2013.12_chicken coop 01

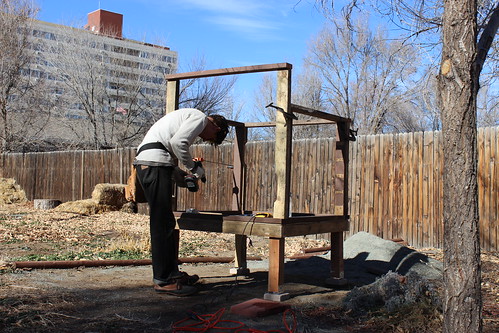
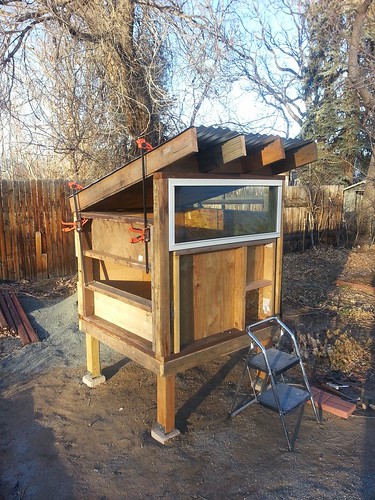
Eric spent the warmer days this past winter building our chicken coop.  Isn't it beautiful?  It is based on one of the simpler designs from Building Chicken Coops for Dummies.  All of the lumber and sheathing is reclaimed wood from Craigslist free.  The siding is reclaimed fencing from our back porch.  The roof is corrugated metal.  The walls, floor, and roof are all insulated (R-19 roof, R-13 walls and floor).

2013.12_chicken coop 02
With insulated 2x4 walls, a 4' x 4' footprint only provided about 12 sf of chicken living area, but with the 48 sf run, this will be enough for 6 chickens. Construction was made easier because regular wall framing with 16" o.c. studs was not required.

2014.01_chicken coop 06
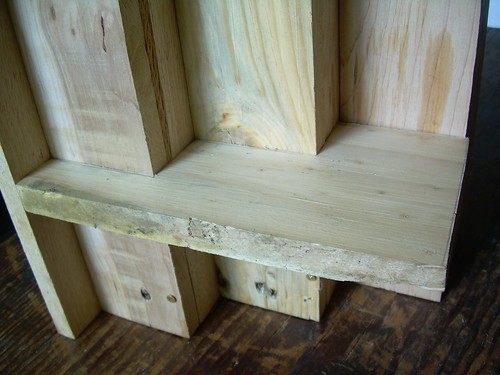
Interior structural sheathing with plywood and OSB. No exterior sheathing (to save weight), just asphalt paper (found in the garage when we moved in) for a water and air barrier, and the cedar cladding on top of that (spaced out with 0.25" furring strips for a rain gap, of course).

2014.01_chicken coop 07
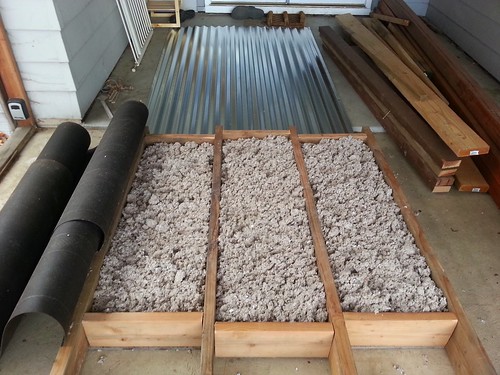
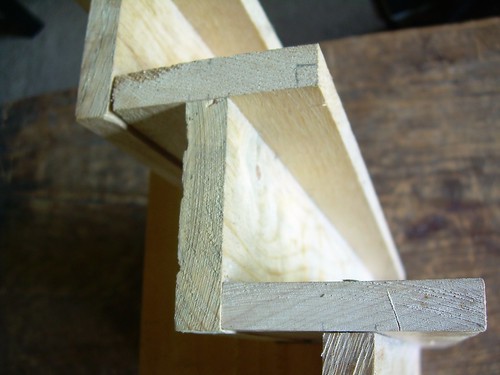
R-19 cellulose insulation for the roof (2x6 rafters). This used a lot more insulation than I thought, since it didn't get passed through the cellulose blower machine to loosen it up. Next time I'd probably use fiberglass batts, but cellulose was convenient because the rafter spacing was not 14.5" so batts wouldn't fit without trimming.


2014.01_chicken coop 08
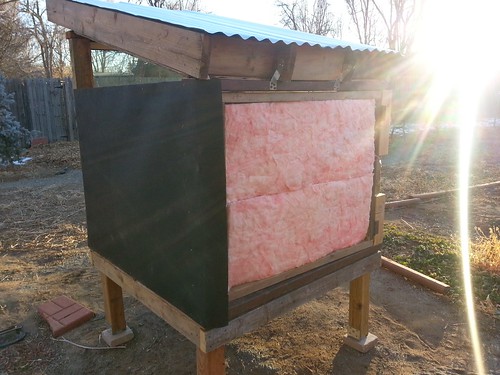
Fiberglass batt wall insulation, covered with asphalt paper.


 2014.01_chicken coop 03
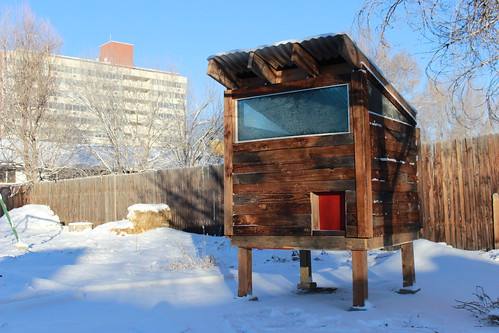
Finished coop, still lacking a run.

The window is a reclaimed triple pane from our local Habitat for Humanity store.  Eric positioned it so that the roof overhang shades the window during the summer but allows plenty of sun during the winter.  There is a wireless temperature sensor inside the coop so we get alerts to close or open up the ventilation areas (removable 1" foil-faced polyisocyanurate rigid foam triangles). The sensor was also used to monitor the heat lamp/temperature during the first 10 weeks when chicks need supplemental heat.

2014.05_chicken coop 09
The 1/2" hardware cloth for the 4' x 12' run was the most expensive component! A nice side effect is that the mesh is closely spaced enough that snow piles on top so the chickens won't be snowed in. Half of the chicken run can be separated to be used as a chicken tractor.

2014.04_chicken coop 05
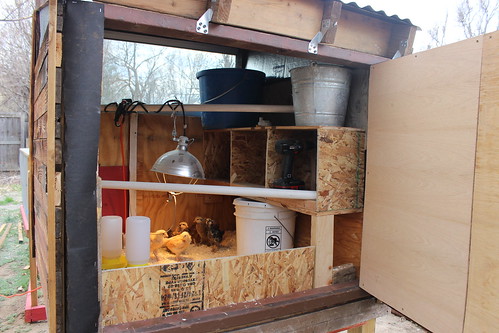
The whole back wall swings open for easy access for cleaning.

2014.03_chicken coop 04
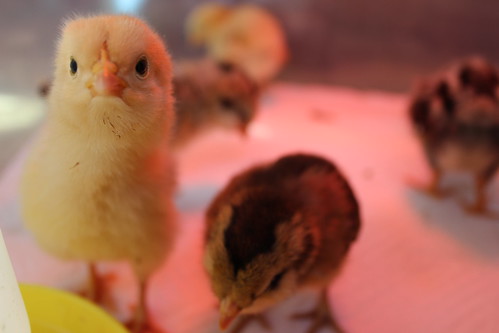
As for the chicks, we got 2 Buff Orphingtons, 2 Ameraucanas, 1 Silver-Laced Wyandotte, and 1 Rhode Island Red.  These chicks are already teenagers now.  At four months old, they look pretty much look full grown.  We expect they will start laying eggs when they are six months old which will be in October!

September 27, 2009

"reclaim your palate" spice rack

I made this spice rack out of reclaimed pallet wood, as part of the OPENworkshop put on in Summer 2007 by OPENSOURCE Art in Champaign-Urbana, Illinois. I realized that I never put a picture of the final product on the OPENworkshop blog, so I decided to take some pictures and write up a little about how I made this simple spice rack.

The rack was designed to fit spice jars up to 2" in diameter, and will fit 30 of these jars. There is lots of space underneath the stairs for storing bulk spice bags and other oddments.

First, we stripped the crossboards off of a bunch of trash-pile pallets. We developed a pretty good method using a circular saw and a pry-bar. Details of the method are described in this post on the OPENworkshop blog. Basically, you saw all the cross-boards in the center so they are easier to pry off. After prying the boards off, the next step is removing the nails from all of the boards using a hammer--hammering from behind and then prying from the front. The nails leave behind cool holes and discoloration patterns that add some character to your finished product.

Next, we planed all of the wood smooth with the electric planer that was generously lent to us, along with many of the other tools, for the OPENworkshop. The electric planer is a really nice tool when working with reclaimed wood. You could do the same with a hand plane, but I imagine it would take a lot longer.

Different pallets will yield different board lengths and thicknesses. There were a good number of pieces that were around 20" long, 3.5" wide, and 0.5+" thick (they must have been 1x4's originally), so I decided to use these for the spice rack. Using a table saw, I ripped seven of the pieces so that they were 2.5" wide. Using a miter saw, I cut them all down to 18" long. I used the planer again to get them all down to the uniform thickness of 0.5".

Then I made three 'T' shapes, screwed the three 'T's together, and then added a back. Then I traced the shape of these stair steps onto a miscellaneous pallet board (at least 4" x 7.5") and cut out two of these supports with a jigsaw. Screw the stairs to the two supports and you're done.
You can tell that I am not an experienced woodworker. I bought brass screws that were more decorative than anything else--the recess stripped incredibly easily.

I've thought about adding some side rails to keep jars from falling off the side, but I haven't really found them necessary and I like the more minimal look. I've also thought about staining or applying some sort of sealant to protect the wood from the liquid dangers of the kitchen, but I'm afraid anything I do will cover up the wood grain or make the finish too shiny, so I've just left it and it has been fine. More photos of the spice rack are on flickr.

You really can make a lot from reclaimed wood. Check out Louis's diagrams showing his system for converting pallet wood and drywall scraps into a modular shelving system or lamps. Mike also made an incredible Illinois shelf.