September 27, 2009

"reclaim your palate" spice rack

I made this spice rack out of reclaimed pallet wood, as part of the OPENworkshop put on in Summer 2007 by OPENSOURCE Art in Champaign-Urbana, Illinois. I realized that I never put a picture of the final product on the OPENworkshop blog, so I decided to take some pictures and write up a little about how I made this simple spice rack.

The rack was designed to fit spice jars up to 2" in diameter, and will fit 30 of these jars. There is lots of space underneath the stairs for storing bulk spice bags and other oddments.

First, we stripped the crossboards off of a bunch of trash-pile pallets. We developed a pretty good method using a circular saw and a pry-bar. Details of the method are described in this post on the OPENworkshop blog. Basically, you saw all the cross-boards in the center so they are easier to pry off. After prying the boards off, the next step is removing the nails from all of the boards using a hammer--hammering from behind and then prying from the front. The nails leave behind cool holes and discoloration patterns that add some character to your finished product.

Next, we planed all of the wood smooth with the electric planer that was generously lent to us, along with many of the other tools, for the OPENworkshop. The electric planer is a really nice tool when working with reclaimed wood. You could do the same with a hand plane, but I imagine it would take a lot longer.

Different pallets will yield different board lengths and thicknesses. There were a good number of pieces that were around 20" long, 3.5" wide, and 0.5+" thick (they must have been 1x4's originally), so I decided to use these for the spice rack. Using a table saw, I ripped seven of the pieces so that they were 2.5" wide. Using a miter saw, I cut them all down to 18" long. I used the planer again to get them all down to the uniform thickness of 0.5".

Then I made three 'T' shapes, screwed the three 'T's together, and then added a back. Then I traced the shape of these stair steps onto a miscellaneous pallet board (at least 4" x 7.5") and cut out two of these supports with a jigsaw. Screw the stairs to the two supports and you're done.
You can tell that I am not an experienced woodworker. I bought brass screws that were more decorative than anything else--the recess stripped incredibly easily.

I've thought about adding some side rails to keep jars from falling off the side, but I haven't really found them necessary and I like the more minimal look. I've also thought about staining or applying some sort of sealant to protect the wood from the liquid dangers of the kitchen, but I'm afraid anything I do will cover up the wood grain or make the finish too shiny, so I've just left it and it has been fine. More photos of the spice rack are on flickr.

You really can make a lot from reclaimed wood. Check out Louis's diagrams showing his system for converting pallet wood and drywall scraps into a modular shelving system or lamps. Mike also made an incredible Illinois shelf.

September 23, 2009

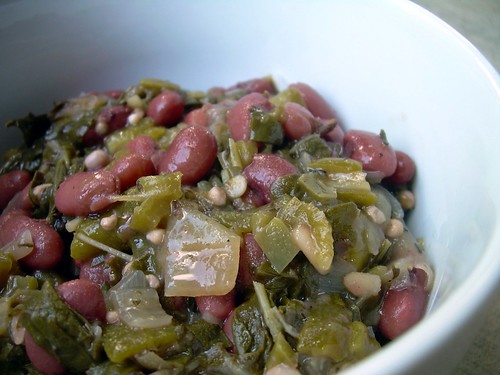
summer gumbo

Traditionally, summer gumbos are thickened with okra and winter gumbos are thickened with filé powder (dried and ground sassafras leaves--instructions for making at home). This is a summer gumbo, but I'm going to keep an eye out for sassafras leaves (ghosts and mittens!) to save for the winter. Also, I need to remember gumbo z'herbes next time we have buttloads (1 butt = 126 gallons) of greens that we don't know what to do with. Dedicated to Caitlin Bergo.

2 T. shortening (or margerine or oil)
2 T. all purpose flour
1 medium onion, diced
2 bell peppers, finely chopped (green or purple)
1 pint (10 oz by weight) okra
1 qt water
2 t. bouillon paste
1 big bunch chard (optional, or any other greens)
3 cloves garlic
1 T. lemon juice
1/2 t. liquid smoke
2 c. cooked red or black beans
1 T. thyme
2 bay leaves
dash ground allspice
dash ground cloves
2 t. salt (to taste)

First make the roux: In a large pot, heat the shortening and mix in the flour, stirring a lot. Cook the roux until it is as dark as you want it; a darker roux will have a stronger flavor that might obscure the okra flavor. But watch out, it is easy to burn, especially if you use margerine or butter instead of oil, shortening (or lard or clarified butter). Then, add in the chopped onion and garlic, saute for a bit (you might have to add more oil), then add green pepper and saute for a bit more. Then add the okra, the quart of water and the bouillon (or homemade stock). If you saute the okra, it might dry out, losing the mucilaginous effect. Chop the chard into thin strips and add to the pot, along with the cooked beans, lemon juice, liquid smoke, thyme, bay leaves, allspice, and cloves. Bring to a boil and simmer for 30 minutes. Add salt to taste. Serve over rice.

sidenote: pressure cooking beans

I forgot to soak my beans overnight, so I decided to try pressure cooking them in our pressure canner. This is the first time we've tried cooking in the canner, but I figured I'd give it a try because it reduces the cooking time from 2 hours to 2 minutes! Now, you are still supposed to soak beans overnight before cooking them in the pressure cooker "for even cooking and to remove water-soluble, gas-producing starches." I did the "quick-soak" method which means you boil the beans for 2 minutes, turn off the heat and leave covered, go to the farmer's market and lay in the sun by the creek for an hour, then return home to find your beans are ready to be cooked for an additional 2 minutes at 15 psi. Apparently you should add 1 Tablespoon of vegetable oil to your beans to reduce the likelihood of froth or foam blocking the vent pipe (and never fill the vessel more than 1/2 full). One of these days I want to hook up a current transformer (CT) to our electric range to measure the energy savings using a pressure canner/cooker.

September 19, 2009

"lost wisdom" pale ale


This was is our first attempt at making beer. We followed this recipe, but dry-hopped with some chinook hops too. I think it turned out pretty good. It has a little bit of a banana ester thing going on. Half the fun of brewing beer is coming up with a name (and label if you are more ambitious) for your beer. We decided to call our beer and mead making endeavors "Cute Owl Friend" after a drawing I made once. We named this beer "Lost Wisdom" because after watching a friend make the same recipe, we forgot the directions when it came time for us to make it. Also, here are some other things named "Lost Wisdom": link, link and link.

September 13, 2009

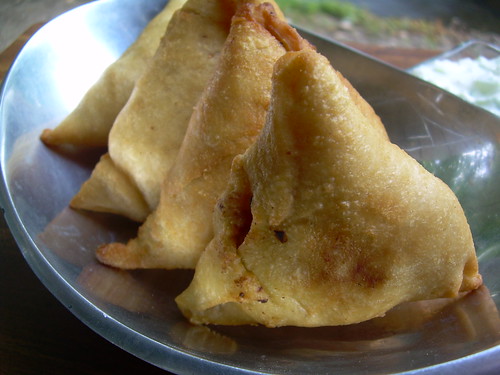
cauliflower samosas with cucumber raita

Honestly, you can't go wrong with deep fried snacks like samosas. I suppose that statement conflicts with my otherwise all-natural, healthy, hippie-self, but I feel I deserve some fatty foods every once in awhile considering my lean vegetarian diet. Besides, Indian food is totally hippie, right?

Samosa Filling Ingredients:
3 c. cauliflower, finely diced
2 c. potato, finely diced
1 c. carrots, finely diced
1 c. onion, finely diced
1 c. edamame (or peas)
2 cloves garlic, minced
2 T. lime juice
1 T. ginger, frozen, minced
1 t. cumin, ground
1 t. corriander, ground
1/2 t. turmeric, ground
1/2 t. cayenne, ground
pinch of ground cloves
salt to taste

Samosa Dough Ingredients:
4 c. all purpose flour
3/4 c. water
3/4 c. vegetable oil
1 t. salt

Cucumber Raita Ingredients:
1 c. cucumber, peeled, seeds removed, finely diced
1/2 t. salt
1 c. yogurt
2 T. onion, minced
1/2 t. cumin, ground
1/2 t. corriander, ground

Prepare the filling by first sauteing the cauliflower, potatoes, carrots and onions until tender. Add the remaining filling ingredients and cook for a few more minutes. Set aside and allow to cool.

Mix the dough ingredients together. Knead for 10 minutes. Let the dough rest for 30 minutes. Grab a 1-2 inch diameter piece of dough. Roll it into a ball and flatten into a disc. Use a rolling pin (or in our case a wine bottle) to roll the disc into a thin 7 inch diameter circle. Cut the circle in half. With a half circle of dough, form a cone in your hand and press the edges together to seal. Fill the dough cone with cauliflower filling. Fold down the top and press to seal. It should look like a triangle. Repeat. When you are done shaping the samosas, fry them until golden.

To make the cucumber raita, start by salting the diced cucumbers. Let it sit for 10 minutes then gently squeeze out excess water. Add the remaining raita ingredients and serve!

September 7, 2009

pilgrimage to CRMPI

A greenhouse at CRMPI (Central Rocky Mountain Permaculture Institute)

I heard about
permaculture when I lived in Illinois via Rob Scott of the School for Designing a Society and Bill Wilson of Midwest Permaculture. I didn't explore the topic much at the time. I apparently thought I was too busy with architecture studio. Silly me.

Luckily, I did not miss my chance because we happened to move to Boulder, Colorado where the
Transition movement and permaculture have a strong presence. I decided that it was time to really learn the concepts of permaculture by signing up for a course with Sandy Cruz and Barbara Mueser of High Alititude Permaculture. The course I signed up for is spread out over 8 months - one whole weekend per month. I am about 6 months in. It has been amazingly thought provoking and inspiring.

So, onto what this post is really about - my pilgrimage to
CRMPI (Central Rocky Mountain Permaculture Institute). A few of my permaculture classmates (including Elizabeth Nitz of Weeds Rock) and myself headed out near Aspen to see what Jerome Osentowski has done with his land in 23 years.

Well, let me tell you, he has built an Eden. Not only that, it is within the challenging landscape of the Rocky Mountains - steep slopes, rocks, red clay, short growing seasons, etc. Where there would normally be pines, he has plums, apricots, apples, grapes, melons, peas, greens, fava beans, tomatoes, peppers, eggplants, medicinal herbs, on and on and on.


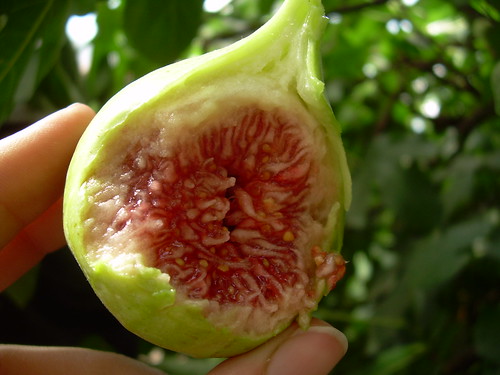
Exhibit A for admiration: a fresh fig that was grown in Jerome's greenhouse, not flown in from California!

Exhibit B for admiration: Jerome's beautiful sheet mulch soil complete with earthworms!

If your interest in permaculture is at all piqued, check out what kind of courses are offered in your area of the country or voyage out to Colorado and take an intensive 2 week design course at CRMPI.

September 2, 2009

green chile

I was first exposed to green chile on my way to a Taos, NM. I flew to Albuquerque and caught a ride to Taos with the family I sat next to on the plane. They took me to a restaurant in Santa Fe and explained to me all about green chile and red chile and how the official state question is "red or green?" I like when regions have their own food specialties or trademarks: Chicago has deep-dish pizza; the Southwest (or more specifically New Mexico) has red and green chile.

So, when I saw tomatillos and smelled roasting green chiles at the farmers market last week, I decided I wanted to try making green chile for myself. If you've never eaten a raw tomatillo, do it. Inside the papery husk, the surface of the fruit is sticky and sweet, like honey. And the fruit itself is almost like a grape or berry (well, technically, it is a berry). Well, they have now all been mixed with chiles we roasted on the grill, along with onions, garlic, vegetable stock, and flour loosely following this recipe. We've been enjoying it on egg sandwiches, hashed cauliflower, and burritos. We also made a delicious uncooked tomatillo salsa.