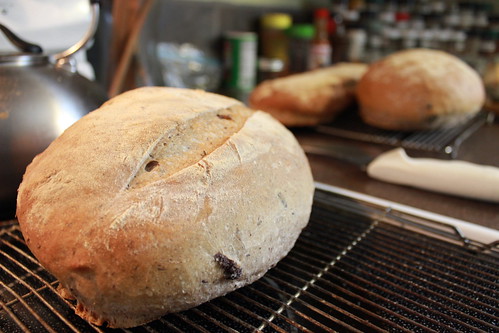
A loaf of rye made in the bread machine
I've been making bread in our bread machine at least once a week for the past couple years. Sure, it's great because it takes less than 10 minutes to make a loaf of bread, but I really enjoy using a bread machine because it is so predictable. When I make bread by hand, there's all these variables: how much flour did I add during kneading? how long did I let the loafs rise and at what temperature?
The beauty of the bread machine is that all those variables are controlled and are exactly the same from one cycle to the next. When I was making bread by hand it often turned out flat or really dense. With the bread machine, I am free to tweak the ingredients from cycle to cycle, knowing that the proofing will be perfect every time.
On weekends, when I have a little bit more time, I often makes baguettes using the bread machine dough cycle.
Another great thing about bread machines is that they are plentiful at thrift stores. When our gratis machine finally broke and I couldn't fix it, I picked up a new, larger machine from a thrift store for 10 bucks.
Here are some general tips on the bread machine process:
Flour - I always weigh this out on a kitchen scale, otherwise the scooper can compact the flour and it is hard to know if a cup is really a cup. All wheat and rye flours I’ve come across are 4.5 oz. per cup. We buy 25 lb. bags of all-purpose flour from a local organics wholesaler that sells to the public. 25 lbs. fits perfectly in a five gallon bucket, which we fit with a Gamma lid.
Paddle - The bread machine’s mixing paddle often gets stuck in the bottom of the loaf when you take it out of the pan. I keep a small pliers in the kitchen for the purpose of removing the paddle. There’s always one or two slices in the middle of the loaf that are holey, but hey, that’s bread machine bread.
Order of ingredients - Wherever possible, I add ingredients in the order that minimizes dirty spoons. For example, in the case of tablespoons, I always add sugar (dry) before oil (wet). I also always add oil before molasses since it prevents the molasses from sticking to the measuring spoon.
Yeast - We buy a large package of bulk yeast and
keep a small container in the fridge, refilling it from the bag,
which we keep in the freezer. You can use the packets too.
Here’s my favorite bread machine recipes:
Seed Bread - 1.5 lb. recipe
(source: modified whole wheat bread recipe from Regal Breadmaker Guide & Cookbook)
8 oz. water
1 t. salt
1 T. sugar
1 T. oil (olive or whatever)
1 T. molasses (optional)
1 egg (optional, makes a fluffier loaf)
4.5 oz. whole wheat flour
9 oz. all-purpose flour
1 t. yeast
1/2–1 c. seeds (I usually do mostly sunflower or pumpkin seeds, supplemented with a few tablespoons of flax, sesame, poppy, or mustard seeds, or even uncooked millet)
Use whole wheat and dark crust settings.
Sourdough - 1.5 lb. recipe
(source: ??)
1 1/4 c. sourdough starter (see below)
1/3 c. water
1 t. salt
1 T. sugar
1 T. oil (olive or whatever)
13.5 oz. all-purpose flour
1 oz. cornmeal (optional)
1 T. vital wheat gluten (optional, gives a better crumb; omit if using high-gluten bread flour instead of all-purpose)
1 t. yeast
1/4 t. citric acid (optional, add if you want it to be extra sour)
Use basic/white bread and medium crust settings.
Sourdough starter recipe (source: Fleischmann’s Yeast Bread Machine Favorites)
2 c. all-purpose flour
2 c. water, lukewarm (105–115ºF)
2 1/4 t. bread yeast
Combine and cover loosely. Let sit on the counter 12–24 hours and then refrigerate until ready to use. I keep my starter in a 24 oz. canning jar (wide mouth, tall, straight sides). When I take out the 1 1/4 c. of starter, I replenish with 1 c. flour and 1 c. lukewarm water.
Baguettes - 3 lb. recipe
(source: modified Zojirushi bread machine baguette recipe)
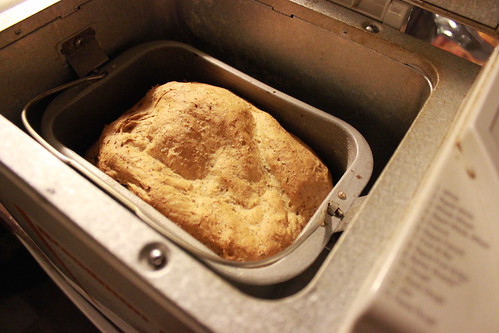
I have a 2 lb. bread machine, but find that I can make 3 lbs. worth of dough using the dough setting. The dough overflows the pan a bit when rising, but not uncontrollably. I usually only make these on weekends because baking in the oven take a bit more time.
2 c. water
1 1/2 t. salt
1 1/2 t. lemon juice
1 lb. 8.7 oz. (700 g) all-purpose or bread flour
1 T. vital wheat gluten (optional, gives a better crumb; omit if using high-gluten bread flour instead of all-purpose)
2 t. yeast
Favorite additions to the baguette dough are rosemary (1 T. dried) and olives (3/4–1 c. kalamata)
- Use the dough setting.
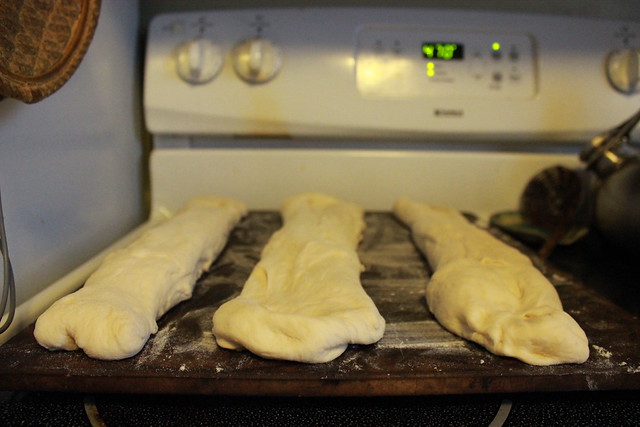
- When cycle finishes, use a spatula to pour/scrape dough onto a floured counter. Sprinkle/spread some flour on the top too. Cut into three chunks with the spatula. Loosely shape the chunks into baguette or batard shapes (it is pretty forgiving) and set on floured pizza stone.
- Preheat oven to 470ºF. Let dough rise about 40 minutes, covered with a damp cloth.
- When ready to bake, flour the tops of the dough again and score the tops.
- Bake for about 30 minutes.
To give the baguettes a better crust, steam them by putting a pan of cold water in the oven at the beginning. I also cover up the
oven’s vent opening (as far as I know, only electric ovens have this) with a damp cloth until the last 5 or 10 minutes of baking.
Before rising:
After baking:
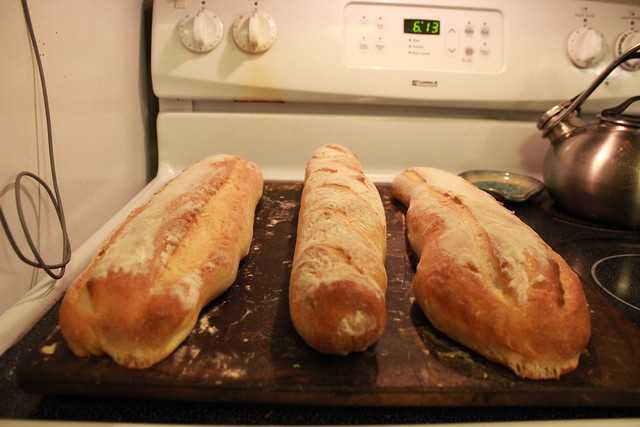
Three olive-rosemary loafs made with the baguette recipe: