May 27, 2013

purslane chips

2013.05_purslane chips
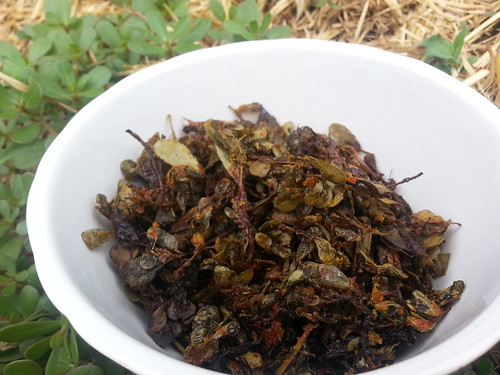
Faced with a large amount of volunteer purslane in the garden, I decided to make purslane chips using our kale chips recipe.

For me, the biggest barrier to using more wildcrafted weeds in my diet is that often they are more difficult to harvest.  Lambsquarter, for example, requires the leaves to be removed individually (at least in my experience).

With this batch of purslane, which I often leave in place as a living mulch around my annual vegetables, I just harvested with a scissors (like lettuce) leaving the roots in place. This is nice because if the roots are pulled, dirt comes with.

I'll definitely be making this again since the purslane is so abundant.

plant inventory

I decided to inventory the weeds and other existing plants in our yard. I hope this will help me discover potential uses for what is already growing and further understand niches and stuff.

WILD / KNOWN:
20130507_141552
Common Mallow (edible and medicinal) - This is growing all over the back yard. I harvested a bunch to dry for mucilaginous tea for sore throats. I'd also like to try it in salads/wraps and using it as a rennet for making cheese (nicknamed cheeseweed).
MORE PLANTS CLICK CLICK

May 20, 2013

they can't say no to free biomass

2013.05_free straw
I am pretty sure that Eric and Greg should start a blog devoted to their inability to say no to free biomass.  They picked up 4 truck loads worth of free straw from a guy on Craigslist who had been using the straw as a bottom bumper for a hillside slip 'n slide.  It was an excellent find since it costs us $10 per bale at the local feed store or $5 per bale at a farm a good drive north.  I do wonder though what kind of predicaments this inability to say no to free biomass could lead to... 

May 9, 2013

phased deep energy retrofit timeline

a slow and steady deep energy retrofit
making your home super energy-efficient doesn’t have to be super expensive


I finally put together a graphical timeline of our home energy retrofit plans, or an energy descent action plan for the home, if you will. It is often most cost-effective to make an older home more efficient in phases, as equipment fails or money is scrounged for projects. However, order matters. For example, if replacing heating or cooling equipment, it is best to wait until after adding insulation to the enclosure so that smaller equipment, which costs less and typically runs more efficiently, can be installed. All these dependencies make it helpful to have a plan so you know what all you have to get done before your boiler fails and what you're going to do when it does.

Here is our plan (created using XMind):
2013.05_Phased Retrofit Timeline
(click to embiggen)


Some highlights:
  1. Radon mitigation - Radon is the biggest health risk in homes, so this is an important health and safety consideration from Day 1. Our home inspection included a radon test which came back just over the recommended action level of 4 pCi/L. We had the seller pay for radon mitigation, which included sealing the crawlspace floor with a polyethylene vapor retarder and a fan that constantly draws from below the membrane. Sealing the crawlspace is Step 1 in converting it to a conditioned crawlspace, which perform better than vented crawlspaces in terms of "safety, health, comfort, durability and energy consumption."
  2. Because of the incentives we got, we were required to make certain improvements within 90 days of closing. The improvements included air sealing, wall insulation, and attic insulation. Getting the attic insulated with 15+ inches of cellulose meant that we had to finish up any attic work before it became virtually inaccessible. So, replacing the whole-house fan and bath exhaust fan, as well as ducting the bath and kitchen exhausts to the outside, became a high priority.
  3. Our asphalt roof is 15–20 years old, which is close to the end of it's expected lifetime. When it is time to replace, we hope to make it PV-ready with a metal roof. Our roof is currently eave-less, so we plan to extend the eaves in order to accommodate an extra 2–4 inches of insulated sheathing in the future (whenever we decide to replace the old steel siding).
I'll be continuing to write about these topics and our progress along the timeline in the coming weeks.

Click to see all posts in this series:
a slow and steady deep energy retrofit

May 8, 2013

finishing the top bar beehive

Our friend Greg made us a top bar beehive out of salvaged wood. We just have to put on the finishing touches: make a roof, attach the legs, and seal the wood to make it more weather resistant:
 
2013.05_sealing the top bar beehive

Build your own top bar hive with these instructions, a supplement to The Barefoot Beekeeper.

The instructions recommended sealing it with a 20:1 mix of raw linseed oil and beeswax. Make sure to get "raw linseed oil" instead of "boiled linseed oil" which contains heavy-metal solvents.

 
The "pure raw linseed oil" that we found at the hardware store said that it contains no additives, yet it still has the "causes cancer/birth defects in California" warning—really confusing! Next time I might opt to get food-grade flaxseed oil, which I believe is essentially the same thing.

Hopefully we can get this thing done in time to get bees when they start swarming!


first asparaguy

2013.05 first asparaguy
Just look at this tiny asparagus shoot coming out of the ground. I was starting to worry about the asparagus and rhubarb starts that we planted—whether they were getting too much water—so it made me really happy to see this.