June 30, 2009

backpacking in gunnison national forest

This past weekend Eric and I went backpacking with some friends in Gunnison National Forest. Before we moved to Colorado last August, we envisioned ourselves backpacking every other weekend. Somehow that didn’t happen. This was our first backpacking trip since we moved here. Don’t worry though we have done plenty of scenic day hikes and bicycle rides!

Our weekend hike was 18.5 miles over 2 days. It was supposed to be 13.5 miles! The accidental detour was beautiful though (see above). We plan on doing more overnighters now that the weather is nice. I hope to explore DIY instant camping food in the future. For now check out our weekend backpacking menu.

The Menu:

Saturday lunch – sandwiches (pre-sliced and buttered baguettes, pre-sliced and salted radishes, cheese, romaine lettuce)

Saturday communal dinner – exorbitant feast (instant rice and beans with wild chives, pre-boiled potatoes, instant berry cobbler, boxed wine)

Sunday breakfast- oatmeal (instant oats pre-mixed with brown sugar, dried cranberries, and slivered almonds), Emergen-C vitamin drink

Sunday lunch- Pemmican Bar, peanut butter, banana chips

Miscellaneous snacks- trail mix, energy bars

June 22, 2009

komatsuna mushroom noodle soup

We've had a string of rainy days in Boulder that made us want some soup. I made this using komatsuna and mushrooms from the farmers market.

Ingredients:
1 T. canola oil
2 small spring shallots (or onion)
6 garlic cloves, minced
4 T. ginger, minced (frozen or fresh)
6 c. water
3-4 t. bouillon/reduced stock
1 c. small dried mushrooms
2 T. mirin
2 T. rice vinegar
2 T. soy sauce
1 lb. Komatsuna
8 oz. rice noodles (fettucine width)
1/4 c. almonds, ground
4 T. miso paste
1 T. sesame oil

In a large soup pot, saute shallots in canola oil for a minute or two. Add the garlic and ginger. When they start to stick to the bottom, add water and stock. Add mushrooms, mirin, rice vinegar, and soy sauce. Chop and add the komatsuna stems, then chop the komatsuna leaves and add. This will give the stems a little bit more time to cook. Wait until the komatsuna looks fully cooked, then add the rice noodles and cook until they are soft. Then, remove from heat and add the ground almonds, miso paste, and sesame oil. The ground almonds add some creaminess to the soup. Dissolving the miso paste can be difficult. It may help to remove a cup or two of the soup liquid to mix with the miso. The sesame oil gives the soup nice sparkling orange oil bubbles floating on top. Top notch!

Side Note:
I used homemade vegetable stock. I saved up onion, garlic, green onion, and maybe a few radish scraps in the freezer. When it came time to make the stock, I fried the scraps in some oil until browned and then added some water. I cooked it down and added a few dashes of soy sauce. The reduced stock doesn't freeze solid, so cubes won't work. I froze it in a small tub so I could scoop out a tablespoon whenever I needed it. And I ended up using it all in this soup! The strength of the stock depends on what you put in it and how much you boil the water down. I estimated this was equivalent to 3-4 boullion cubes or teaspoons of boullion paste. You could use a dashi stock for a more authentically Japanese soup.

June 21, 2009

garlic scape pesto

Garlic scapes came in our Abbondanza farm share for the past two weeks. They are good in a stir fry, but I think pesto is my favorite way to eat them. I threw some spinach into this pesto, but that's totally optional. The spinach calms the bite of the garlic a little bit though not too much. If you're lucky enough to have basil, you can of course use that too. As I've mentioned before, I find that pesto is usually creamy enough without pine nuts or walnuts or parmesan but you're the boss. Now DO IT!

Ingredients:
2 handfuls of garlic scapes, chopped into 1-2 inch segments (around half a pound)
2 handfuls of spinach (optional)
1/2 c. olive oil
1/2 t. salt

Blend everything! Yum!

June 16, 2009

mojito

A friend recently let us help weed her garden... we took home 2 plastic grocery bags of mint! When you have lemons make lemonade; when you have mint make a mojito!

Serving Size: 1

Ingredients:
5 fresh mint leaves
1 T. lime juice
1 T. light agave nectar
2 oz. light rum
4 oz. sparkling water
2 ice cubes

Put the mint leaves, lime juice, and agave nectar in a glass. "Muddle" the mint - a.k.a. mash the mint a little with the back a big wooden spoon or something. Stir in the rum and sparkling water. Add two ice cubes. If you're trying to impress someone, garnish it with a slice of lime.

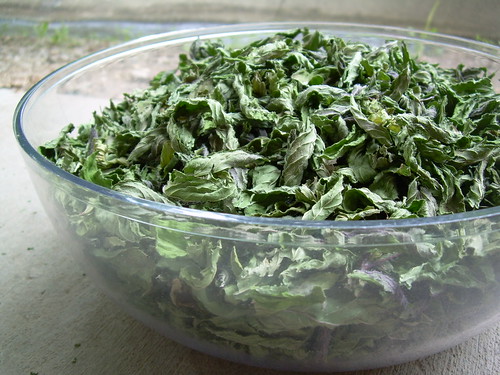
We hung the rest of the mint up to dry. When everything was dry, we pulled the leaves from the stems. We'll be drinking mint tea all winter!

June 11, 2009

refried beans with chive flowers

Beans are so awesome! Local beans are even more awesome! Local beans of Native American origin are DOUBLE even more awesome!!

In September 2007
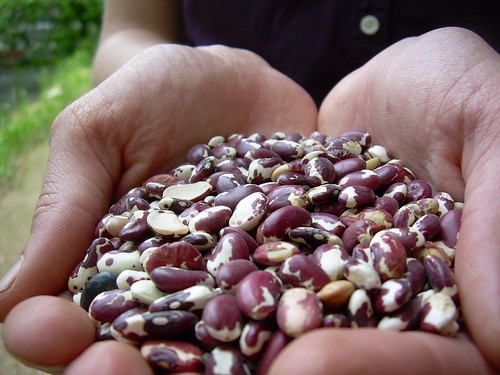
, Eric and I challenged ourselves by eating only local food for 30 days. Granted, we were living in Urbana, Illinois where the soil is rich and the farmer's market and food co-op run strong. Still, one thing we had difficulty buying at the time was local protein beans. When we moved to Boulder, Colorado we were extra psyched to see Abbondanza Organic Seeds & Produce selling anasazi beans and other interesting bean varieties!

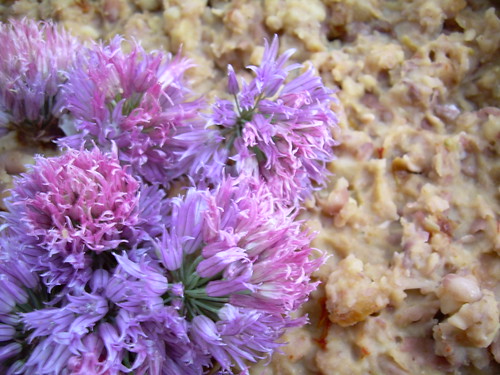
We transformed our local anasazi beans into tasty refried beans and topped them with chive flowers from our friend's community garden plot. Pretty, no?

Serving Size: 8

Ingredients:
2 c. anasazi (or pinto) beans, dry (about 4 cups cooked)
1 medium onion
1/2 c. canola oil
1/2 c. water
4 cloves garlic
1 ancho chili, dry, ground
1 t. salt
1 t. oregano
1/2 t. cumin, ground
1/2 t. corriander, ground
1/8 t. cayenne pepper, ground
chive flowers

Soak the beans overnight. Cook the beans until they are soft. Drain, rinse and mash the beans.

Saute the onions until translucent. Add garlic and spices. Add the mashed beans and water. Adjust water as necessary. Top with chive flowers. Add hot sauce as desired.

Eat as a side dish or in a burrito or on nachos or here-or-there or anywhere!

June 5, 2009

hot sauce

I've been experimenting with making hot sauce from last summer's dried chili peppers. Lots of the hot sauce recipes out there have many ingredients, but I found a simple recipe foundation on Bob DuCharme's weblog:

Basic Ingredients:
2 or more peppers of any kind
1/2 c. vinegar
1 t. salt

Update: These three ingredients are the sole ingredients of Tabasco sauce, which is aged for up to three years in white oak barrels before being sold.

Remove stems from peppers if fresh. Boil the vinegar and blanch the peppers for 2-3 minutes (if fresh) or enough to soften up dried peppers. Puree all ingredients and funnel into a container. Don't stick your nose in the blender--this stuff burns! You might want to open some windows too. The flavor will improve with age, so wait a week before using the sauce.

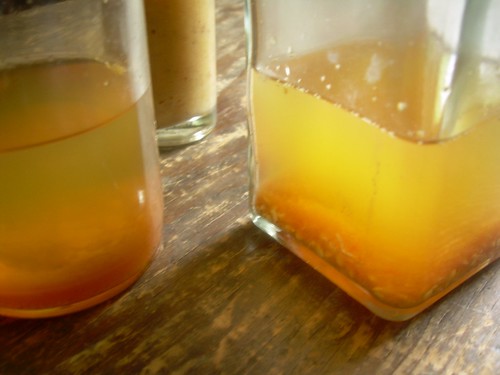
Here's the three variants I've made so far, using our "hopped-up honey vinegar" that we accidentally made from our "braggot" (hop mead). It isn't a strong vinegar and may still be part alcohol. It tastes a bit like lemonade; the hops gives the hot sauce a slightly fruity or citrus flavor.

#1
(front left in photo)
1/2 dried habanero peppers
1/2 c. hopped-up honey vinegar
1 t. salt

#2 (front right in photo)
1 t. seeds of various peppers
1/2 c. hopped-up honey vinegar
1 t. salt

#3 (hiding in the back in photo)
3-4 dried chiles de árbol, seeds removed
2 cloves garlic
1/2 c. hopped-up honey vinegar
1 t. salt
1 t. arrowroot powder

And here's a bunch of additional ingredients/options to try:
Grill/roast/smoke the peppers
Sugar/honey/molasses

Garlic

Ginger
Lime/lemon juice
Onion
Tomato
Apple cider or other vinegars

Cilantro
Oregano
Cocoa, cinnamon, sugar (for mole-type sauce)
Tequila or other alcohol to replace vinegar

Some form of starch (flour, corn starch, arrowroot, etc.) can be added to make a thicker sauce.

So far, I like #3 best, because of the slightly thicker consistency and garlic. The habanero one (#1) is good also, but I think all three of them could be hotter. I don't know though, maybe I'm just building up a tolerance for hot sauce from tasting these. Julie says they're all plenty hot.

June 4, 2009

community supported agriculture

We picked up our first community supported agriculture share from Abbondanza Organic Seeds & Produce!!!

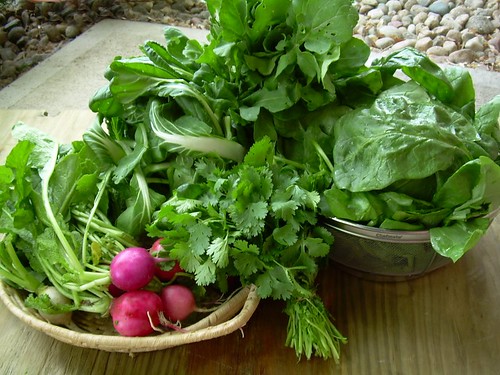
Community supported agriculture (CSA) is like a seasonal subscription to a local farm. You give a farm money before the growing season begins and the farm agrees to give you a share of their bounty each week throughout their growing season. CSA's are beneficial to small time, local, organic farms for many reasons. They provide money to the farmer up front when they need it for seed and equipment. Having a pre-arranged client base helps the farmer predict how much to grow and what their profit will be. They don't simply rely only on sales at the farmer's market that may vary from week to week. Risk is also reduced for the farmer because you pay for a share of what is grown. If it is a bad growing season you will get less produce than anticipated but if all goes well you will get a bounty (see above photo).

As a consumer, you have the benefit of really knowing your food and your farmer, building community and smaller economies, and being well fed with deliciously nutritious, super fresh produce!!

May 31, 2009

palak paneer

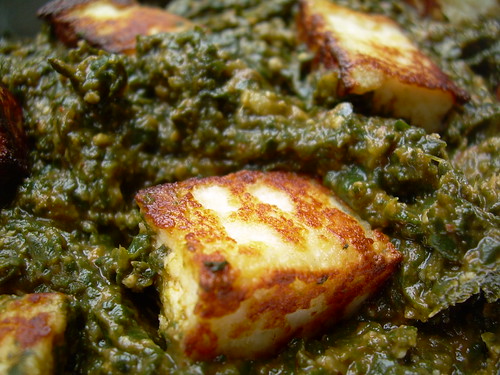
With the amount of spinach at the farmer's market right now, we are finding that we need to change up how we eat it - not just in salads, not just on sandwiches, not just steamed. An Indian spinach stew called palak paneer happens to be one of Julie's favorite dishes. Palak paneer is deliciously creamy and smooth. If you are thinking of trying Indian food for the first time, this is a good dish to start with.

Palak refers to the spinach and paneer refers to little cubes of soft cheese. Palak is often made with heavy cream, whole milk and ghee. Apparently, cashews can be used instead of milk products to add creaminess but they traditionally are used only for special occasions because cashews are expensive. Well, since we can afford cashews for more than just special occassions and since we wanted our palak to potentially feed our vegan friends, we made ours with cashews. Being the make-it-from-scratchers that we are, we made the paneer from scratch. If you are making this dish vegan you could easily replace the paneer with tofu.


Serving Size: 6

Paneer Ingredients:
1/2 gal. whole milk
3 T. lemon juice
2 layers of cheesecloth, approximately 12"x12" squares

Palak Ingredients:
1 lb raw spinach
1/3 c. (~50g) cashews
1/2 onion, minced
3 oz. tomato paste or 1 tomato
2 T. earth balance margerine
1 T. frozen cilantro
1 t. frozen ginger
1 t. turmeric, ground
2 cloves garlic, minced
1/2 t. ground cayenne
1/2 t. cumin, ground
1/2 t. corriander ground
salt to taste

For the paneer, I followed instructions from Indira's blog titled "Mahanandi". I also found helpful comments at the blog "food and other musings".

Basically, boil milk in a tall pot. Try to keep it at a rolling boil for at least 5 minutes. Stirring a lot and having a tall pot helps to keep the foam from spilling over. Then, remove from heat, add lemon juice, and stir for 3 minutes. Curds will form. Let it sit for 10 minutes to get more curds.

If you don't get many curds, you can just boil it again and try adding lemon juice a second time. Reading the comments on the blogs mentioned above really helped--I'll summarize what I think are the most important points below:
  • Both pasteurized and raw milk will work.
  • Ultra-pasteurized or ultra high temperature (UHT) milk will not work.
  • Cow, goat, sheep, horse milk...it's all good.
  • Whole milk works best. 2%, 1%, and skim may work, but will yield less cheese.
  • Use the tallest pot you got.
  • Boil the milk for at least 5 minutes, stirring to prevent the foam from spilling over.
  • You can use any acid to promote curdling: lemon juice, lime juice, vinegar, yogurt.
  • When the curds form, a translucent, yellowy liquid (whey) will remain.
  • When the curds do form, it is like magic.
Strain the curds through the cheesecloth, saving the whey (you can put it in shakes or make ricotta). Flatten the curds on a plate to 1/2" thickness. Press between two plates for at least 20 minutes to squeeze out more whey. Refrigerate overnight.

For the palak, I used Indira's palak recipe as a starting point.

In medium pot over low heat, melt 1 T. margerine and add the cayenne pepper and spinach. A pound of spinach may sound like a lot, but it cooks down dramatically. Feel free to use fresh green chilis instead of cayenne pepper. When the spinach is wilted, let it cool (you can add ice cubes if you're in a rush) and blend it in the food processor. Mix in half of a 6 oz. can of tomato paste. If tomatoes are in season, boil and mash a fresh tomato instead of using tomato paste. Set aside.

Dry-roast the cashews. Then blend the cashews to a fine powder in a food processor. Set aside. Use the already dirtied food processor once again to mince the onions.

Saute the onions in 1 T. of margarine until translucent. Add in the ginger, cilantro, garlic, turmeric, cumin, and coriander. Cook for a few minutes. Add in the wilted spinach, tomato and cashew powder. Mix well and salt to taste. Remove the paneer from the fridge and cut it into cubes. You can fry it first or add it to the palak as is. Serve with rice, rotis, or naan.


Side Notes:
Saag is pretty much the same thing as palak except that palak is exclusively spinach while saag can have mustard greens. I bet garlic mustard would make a great saag!

If you have raw milk, you can skip the boiling step and simply form curds and whey by letting it "spoil". Do not do this with pasteurized milk because it skips the curds and whey step and goes straight to bad. Bad meaning bad, not bad meaning good.

Indira's blog is one of my new favorites--the photos are great! Go here for the most recent posts!

May 30, 2009

transplants

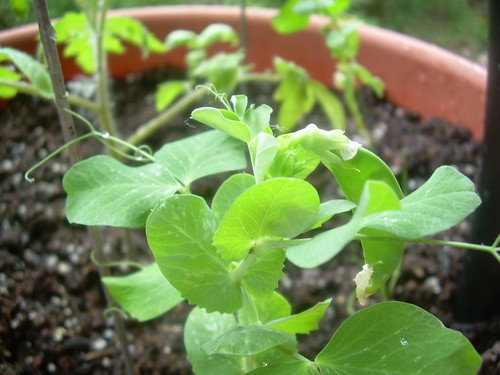
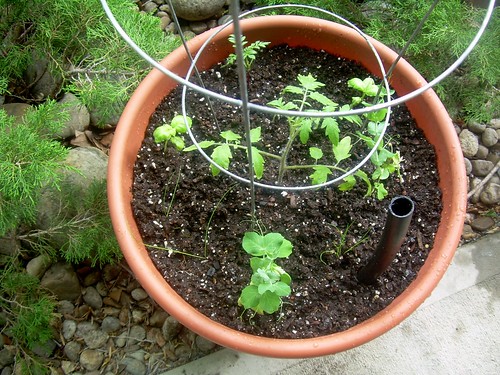
Well, we transplanted seedlings into our self irrigating planter. In one planter we have 1 tomato, 2 dwarf peas, 2 basils, 2 chives and 1 marigold. When the plants are a little more established I think I will add some red clover for ground cover. Here's hoping for the best!

May 27, 2009

self irrigating planter

We live in a 550 sq.ft. apartment in "downtown" Boulder. We like the location. We can walk or bike to anywhere we want/need to go. Of course, I would love to own instead of a rent and I would LOVE to have a yard but that is just going to have to wait. In the mean time, I am trying to figure out container gardening.

I do not have a green thumb but I desperately want one. It is a good thing I have an entire life to make mistakes and learn!
The last few years, I have half-heartedly tried to grow annuals like cabbage and squash in containers. I have killed said annuals in an assortment of ways. For example, I have forgotten to water them, left them out in huge storms, given them too dense of soil, let them get eaten by bugs, etc, etc. Basically I neglect them at some point and for a container garden that is definitely NOT COOL. This year, since I am finally free of school, I promise not to neglect my container garden.

Water management is one of the trickiest things to container gardening. The soil in containers dries out much quicker than that in the earth. Annual crops that are grown in containers require water at least twice a day! That's a lot of human input! No wonder I end up messing things up. So, just in case I get flaky or I choose to go away for the weekend, I built a self irrigating planter.


A self irrigating planter stores water at the base of the container so that the roots pull it in as needed. Stores sell pre-made self irrigating planters but it will cost you since it is a specialty item. Many people build their own out of things like rubbermaid storage containers and 5 gallon buckets. Check it: Self Irrigating Planter Resources on Homegrown Evolution


I like the thrift of these designs but for myself I want to explore the possibilities of plastic planters that are terra cotta colored. Why? Because I want our DIY self irrigating planters to blend in with all of our other standard pots which are terra cotta. Also, the terra cotta aesthetic is cleaner and warmer which is important since I want my apartment neighbors and landlord to like what I am doing.


Ingredients:
18 in. (at top) round plastic planter, terra cotta colored
12 in. (at top) round plastic planter tray
empty earth balance container
12.5 in (at base) round plastic laundry basket
18 in. long, 1 in. diameter irrigation pipe
zip ties

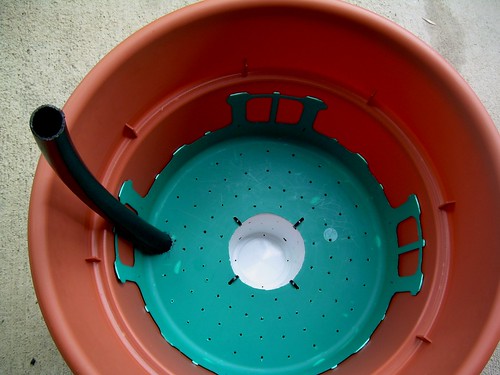
Put the planter tray inside the planter. It should perfectly nest at the base of the planter. The planter tray that we chose will hold 10 cups of water. Overflow water will fall over the sides of the planter tray and through the holes in the base of the planter.

Leave an air gap above the water so that plant roots can breathe. Drill 4 small holes in the planter just above the planter tray to supply air to the air gap.

Find a plastic laundry basket at a thrift store that will nest inside planter a few inches above the base. The laundry basket will hold the soil above the water resevoir and air gap. Drill small holes in the laundry basket so that the roots have access to air. Cut out holes for the wicking chamber at the center and irrigation pipe on the perimeter. Remove most of the side lattice of the laundry basket.

The wicking chamber connects the soil to the water. Create a wicking chamber by drilling holes in a margarine container. Attach it to the laundry basket with zip ties.

To supply water to the resevoir at the base of the planter, provide an irrigation pipe that goes through the laundry basket to the base. Cut the base of the pipe at an angle to ensure water flow.

Note:
This design is untested so I will report my observations throughout the season!

Credit:
The tomato plant photo used in the diagram above came from flickr's "sameold2008"