April 10, 2010

dandelion rhubarb mead

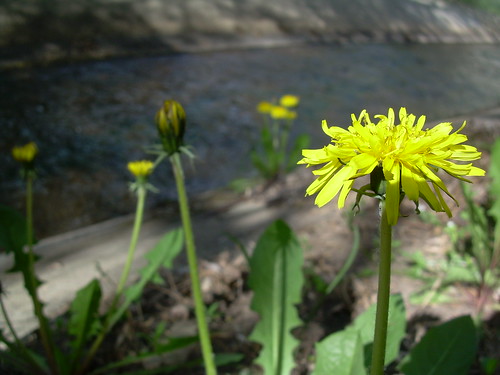
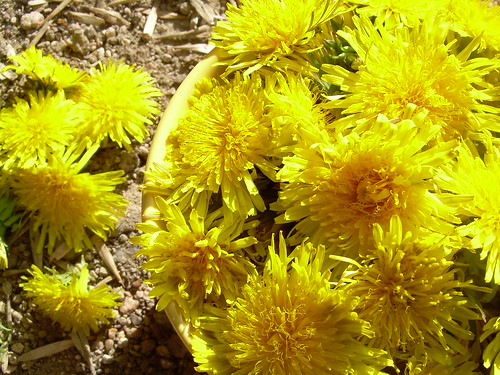
Once again, the dandelions are saying hello. Modern U.S. society has a funny hatred for dandelions. The truth of the matter is that for a long long time people across the world have found dandelions valuable for their early spring nutrition and for their medicinal values. In fact, European immigrants purposefully brought dandelion seeds to North America. So quit spraying your lawns with herbicides and start being thankful!

This time last year, Eric and I started fermenting dandelion rhubarb mead. It took about a month of going on walks and picking dandelions to gather enough flower petals. It's kind of a process, but its a good excuse to take a walk! It is good to pick right now because people haven't gotten fanatic about their lawns yet. Later in the season you have to pay more attention to who sprays herbicides and who doesn't.

We painstakingly removed all the green sepals from the yellow petals. Some recipes say you should, some say it's not necessary. Next time, we'll try using the whole flower heads, because this was WAY too much work--although it was a nice meditative kind of work (see middle photo below).

Ingredients:
3 qt. rhubarb stalks, chopped and frozen
~1 qt. dandelion flower petals, frozen
2.5 lb. honey

Bring 2 qt water up to almost boiling (180F). Stir in honey and maintain temperature at 160-180F for a while to pasteurize. Higher temperatures are fine, but you will lose honey flavor. Pour the hot honey-water over the rhubarb and dandelion petals in a primary fermentation bucket. You can use an airlock fit in the bucket lid, or do what we did and just cover the bucket with a towel--there should be enough CO2 being belched out that baddies can't get in. After a few weeks, strain out the solids and rack into a secondary fermenter with airlock. Rack it again and bottle when it's done bubbling.

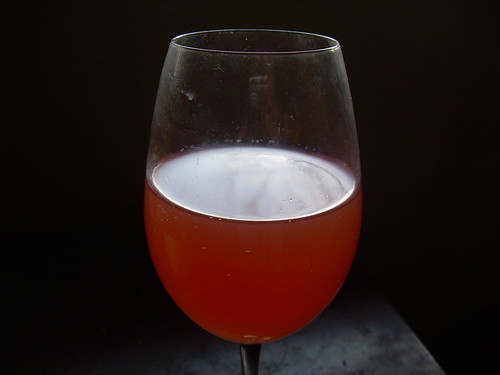
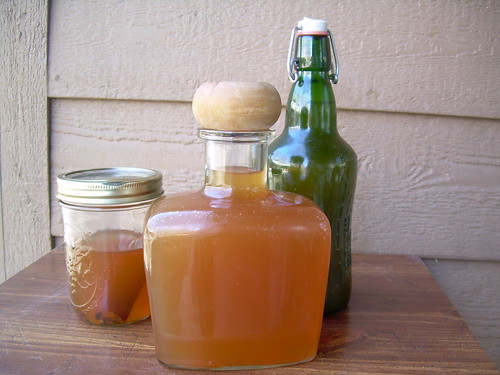
The finished product! It has a nice pink color. Our last rhubarb mead was yellow, strangely--maybe the rhubarb wasn't ripe? At first tasting, the mead was a bit harsh and I would say it needed some aging. But after sitting out for an hour or so, it got pretty good. Maybe this is similar to the effect of decanting wine?

April 3, 2010

home fries with cashew sauce

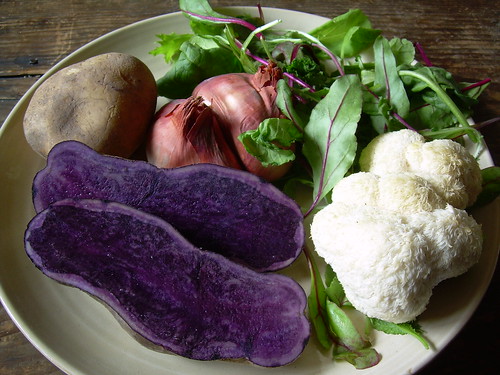
Yesssssssss! Today was the first day of the Boulder Farmer's Market! I've been counting down for months now. Even though it was hard to wait, it made me really appreciate the first day of this seasonal ritual of meandering the stands of local farmer's and gratefully acquiring some gorgeous produce. I made the above produce into this:

a pile of purple peruvian and yukon gold home fries nested in a bed of tender mixed greens smothered in a creamy cashew sauce and accompanied by a side of sauteed lion's mane mushroom. Mmm, now I can't wait for next Saturday and the Saturday after that and the Saturday after that...

Serving Size: 2

Home Fry Ingredients:
2 medium potatoes, cubed (about 2 1/2 c.)
olive oil
1/2 c. shallot, minced
5 cloves garlic, minced
1 t. rosemary, crushed
salt to taste
black pepper to taste
1 T. lemon juice

Cashew Sauce Ingredients:
1/2 c. raw cashews
1/2 c. starchy hot water (left over from boiling the potatoes)
1 T. shallot, minced
2 cloves garlic, minced
2 t. olive oil
2 t. lemon juice
salt to taste

greens
lion's mane mushroom

Boil the potatoes for 10 minutes or until they just start to get tender enough that you can stick a fork in them. Pour off the water, saving 1/2 a cup of the potato water for the cashew sauce. Coat the potatoes in some olive oil and cook them in a cast iron skillet or frying pan for 10-15 minutes over medium-high heat. Stir sparingly or else you'll end up with mashed potatoes. When the potatoes are golden brown, add the shallots, garlic, rosemary, salt and black pepper and cook until done. Turn off the heat and add lemon juice.

Sautee the shallot and garlic for the cashew sauce. Throw all of the cashew sauce ingredients in a blender and liquify!

Serve the home fries smothered in cashew sauce with fresh, rinsed greens and lion's mane mushrooms (or some other mushroom) sauteed in olive oil, salt, and lemon juice.

applejack (freeze distillation) and sparkling cider

About eight months ago, we started fermenting two one-gallon batches of hard apple cider.

Batch #1 - Applejack via freeze distillation
I should start out by saying that home distillation of alcohol is illegal in many countries, unless you plan on using it for fuel. Freeze distillation, also known as fractional freezing, has long been used as a way to increase alcohol content of beverages like ice beer (e.g. Icehouse) and making applejack out of hard apple cider. You can't achieve the same alcohol concentration that you can with evaporative distillation, but the freezing method is cheaper and easier. Freeze distillation removes the water from the alcohols (ethanol, methanol, and fusel alcohols) instead of evaporating and condensing out the desired ethanol from everything else, as in conventional distillation. Methanol and fusel alcohols are generally considered undesirable (and hangover-causing) but they are present in undistilled beer and wine, and contribute to the flavor profile of ales and ciders. But at least with freeze distillation you can't accidentally end up condensing high concentrations of fusel alcohols by evaporating at the wrong temperature. I'm intrigued by some of the homemade evaporation stills I've seen, but I'm still intimidated by the need to keep track of the heads and tails of the process.

So, for this first batch, I added 1/2 cup of sugar every month or so until fermentation no longer re-started after adding sugar. In other words, until it was so alcoholic, yeast could no longer survive. This tolerance depends on the strain of yeast, but ranges from 5% for some beer and baking yeasts, to 23% for some "turbo yeast" strains. I forget what type of yeast I pitched--probably wine or champagne yeast, so I'd guess this batch maxed out at around 12-15% abv. When winter came around I put this batch in a 5-gal on the back porch. Repetitive freeze-thaw cycles are supposed to help with separating water from alcohol. I don't think it actually ever got cold enough to freeze though. Luckily, our freezer was able to get it cold enough, so this spring, I froze it in batches, and let the concentrated applejack strain out, as shown in this video:


And so, one gallon of hard apple cider became one half gallon of applejack. I'd estimate a final alcohol content of 20-30% for the applejack. Although I tried lighting it on fire, it didn't burn, but I did accidentally spill some of the fuel in my mouth, and it does taste really good! I even made a digestif of sorts, by soaking a "cinnamon" stick and cloves in a pint of the applejack. It tastes really good too!

Batch #2 - Sparkling Cider
For the other batch, I wanted to emulate ciders like Strongbow or Woodchuck. After the initial cup of sugar, I didn't add any more until we bottled it. We added priming sugar like you would for beer, aiming for 3 volumes of CO2. The verdict: it is good, but needs some aging to mellow out the flavor.

On a side note, I am super-intrigued by this inexpensive force carbonation method: capturing CO2 from fermentation in a mylar balloon and then force carbonating a mini-keg using a homemade PVC pump!

digestifs / tinctures

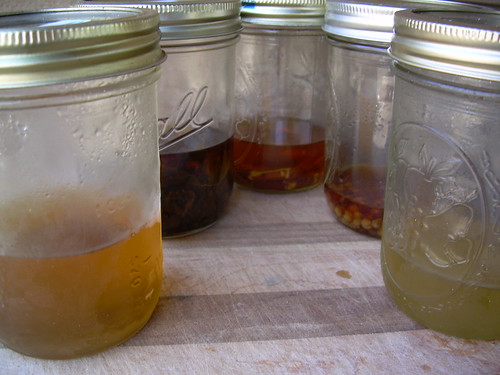
I've been experimenting with making various digestifs or tinctures of herbs that help with digestion. Pictured are tinctures of (left to right) basil, mint, licorice (glycyrrhiza glabra), sichuan pepper, and fennel, soaked for a week or so in cheap vodka (80 proof).

The sichuan pepper is experimental and pretty intense: it numbs your mouth and makes you want to throw up...the rest are carminatives known to help digestion. Basil, mint, and fennel are my favorites. You can mix equally with simple sugar syrup to make them tastier.

March 29, 2010

stayin' alive

It's spring and our worms are still alive! Last winter, we awoke each morning to find a few worms had escaped their bin and dried out on the kitchen floor, in search of A) warmth, B) food, or C) moisture. We attribute their success this winter to two changes we made after buying a new batch of worms last spring:
  1. Insulation - Our kitchen has floor to ceiling north-facing glass as seen in the photo above (blech!) . We covered up the bottom half of of this window with a scrap piece of 2" polyiso. insulation board (R-13) to prevent the cold window from sucking radiant heat away from the worms. This of course led to condensation and ice between the glass and the insulation, so I propped the insulation up 1" to allow airflow behind the board. This means we aren't reducing the convective heat loss of the window, but at least there is no ice formation (and melting)!
  2. Worm smoothies - We now blend most of the kitchen scraps that we feed to the worms. This makes the food more immediately available to the worms ("worms are like straws") as opposed to waiting for other organisms to break it down first (which would slow in the winter due to lower temperatures). We don't bother blending tea or coffee grounds. This might not work as well in more humid climates or with plastic bins.
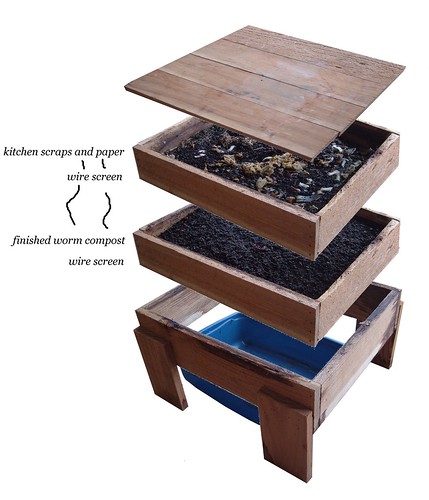
Below is a diagram of our worm bin. We put kitchen scraps and shredded paper at the top, adding a tray to the top as they fill up and removing the bottom trays when we want to harvest the worm compost for our container garden. We bought the bin from a guy in Denver but you could easily staple a few pieces of wood together and attach some wire mesh.

March 27, 2010

homemade honey oatmeal soap

About a month ago, a friend and I made a batch of honey oatmeal soap. It is finally done curing and ready for use!

March 20, 2010

vegan chicago-style deep dish pizza

As we've mentioned before, we rarely put cheese on homemade pizza--cheese is expensive and you can make pizza that tastes great without it, even Chicago-style deep dish pizza. Although this doesn't have the stringy cheese characteristic of of Chicago-style deep dish pizza, the tofu ricotta filling is quite good. We made this, along with the shepherd's pie for a pi day party and both were a hit.

The crust recipe we used is no longer online, but searching for a "Chicago style pizza crust" will yield many results.

Filling:
I took 1 lb. extra-firm tofu, crumbled it and drained it in a colander. Then I mixed in some minced garlic, salt, and oregano. The sauce was 2 pints of our canned tomato sauce, cooked down to the right consistency, with olive oil, honey, oregano, and basil. After baking, sprinkle with "gomasio-ish parmesean": toasted sesame seeds, lightly ground with a bit of salt and nutritional yeast.

March 16, 2010

vegetarian shepherd's pie

Underneath the garlic chive mashed potatoes, I've got tempeh, carrots, green beans, mushrooms, and onions cooked in olive oil, soy sauce, molasses, red wine, parsley, and black pepper. Sorry, no measurements, only inspiration!

March 14, 2010

diy grow light

Time to start seedlings! Inspired by our friends Tom and Susan, we made this grow light. Store-bought grow lights can cost a pretty penny, but you can use standard linear fluorescents. You don't even need special full-spectrum lamps. Wikipedia and another source say that cool blue color temperature lamps are better for the initial growth stage, whereas the warm red-orange spectrum lamps are better for the flowering stage. Full-spectrum lamps can be ten times as expensive as standard lamps and are less efficient at providing the blue spectrum necessary for the initial growth stage. You can use one cooler color lamp and one warmer color lamp if you want to keep growing into the flowering stage. If you are a plant biologist, please correct me if I am wrong.

I think much of what you pay for in a commercial grow light is the super-duper reflector. We just used a section of round aluminum ductwork and it seems to work very well.

If you own your abode or if you have a cool landlord, you can simply hang the fluorescent fixture from the ceiling above your seedling table. Since we don't own and our landlord isn't that cool, we built a stand out of PVC pipe to hold up the fluorescent bulbs. From what we've read, you're supposed to keep fluorescent lights 4 inches above the tops of the plants, so we incorporated a method to raise and lower the lights by adjusting the length of chain.

Our total cost was about $35 but I am sure if you found a used 4 foot fixture you could do it for way less. For maximum energy efficiency, look for T8 or T5 lamps, and avoid T12s. We spent most of the $35 on a new, energy efficient 2 foot T5 fixture because we live in a tiny apartment where counter space is limited.

Here's what we used:
4 - 5" long 3/4" diameter PVC pipe (stand base)
2 - 28" long 3/4" diameter PVC pipe (stand base)
2 - 20" long 3/4" diameter PVC pipe (stand verticals)
1 - 28" long 3/4" diameter PVC pipe (stand top)
8 - 3/4" PVC tee connector (stand joints)
2 - 1 1/4" diameter rings (hang around the top of the stand)
2 - carabiners (connect the light fixture to the rings)
1 - 2-lamp T5 linear fluorescent light fixture
1 - grounded power cord
1 - switch
1 - 3x24" aluminum snap lock duct vent (light reflector)

Optional bits:
2 - 6" chains (to adjust the height of the light fixture)
2 - carabiners (to adjust the height of the light fixture)
1 - lighting timer (to turn the light on and off when you're not around)

March 9, 2010

ethiopian wat

Wat what? It's thick Ethiopian stew. Wats come in all sorts of flavors. Eric and I made a simple red lentil wat and a winter squash, chard, berber wat. We also made injera, a sour flat bread akin to crepes. Injera is actually the reason I crave Ethiopian food. Our injera was all teff flour which is supposed to be more authentic, but I am accustomed to the white flour/teff flour mix in our American Ethiopian restaurants so I think that's what we'll make next time. Oh, and it is important to know that you will not need utensils for your meal because you simply grab food with the injera.